Section 9.8
Metri-Pack 150 Series Connectors
Metri-Pack 150 series connectors are "pull-to-seat" connectors. Each wire must be pushed through the connector prior to crimping the terminal. Cable seals are inserted into the shell of the connector and hold many wires.
Section 9.8.1
Repair and Replacement of Metri-Pack 150 Series Connectors
Repairs to Metri-Pack 150 series connectors are not possible. Remove the defective or damaged connector and replace. Refer to "9.8.2 Removal of Metri-Pack 150 Series Connectors" .
Section 9.8.2
Removal of Metri-Pack 150 Series Connectors
A tang on the terminal locks into a tab molded into the plastic connector to retain the cable assembly. Remove and repair Metri-Pack 150 terminals using the following instructions.
- Insert the removal tool into the cavity of the connector, placing the tip of the tool between the locking tang of the terminal and the wall of the cavity. See Figure
"Terminal Removal"
.
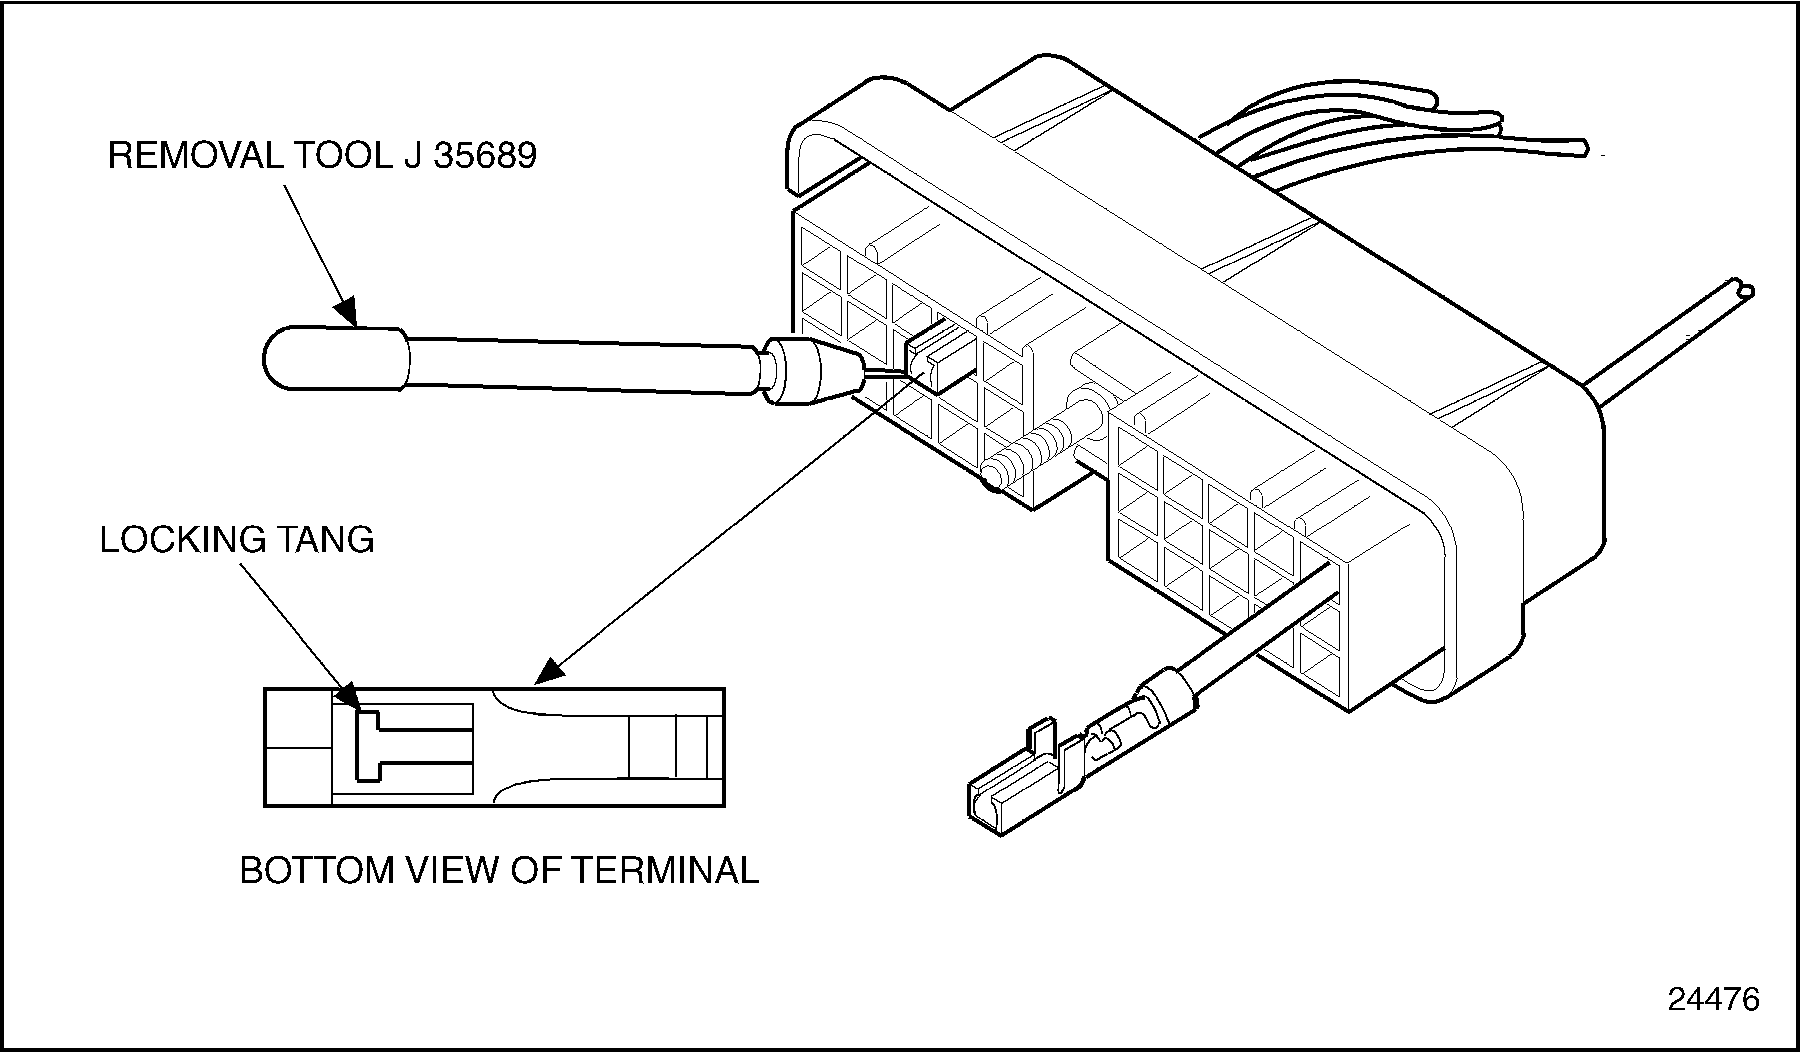
Figure 1. Terminal Removal
- Depress the tang of the terminal to release it from the connector.
- Push the cable forward through the terminal until the complete crimp is exposed.
- Cut the cable immediately behind the damaged terminal to repair it.
- Follow the installation instructions for crimping the terminal and inserting it into the connector.
Section 9.8.3
Installation of Metri-Pack 150 Series Connectors
Metri-Pack 150 connectors are of the "pull-to-seat" type. Each cable must be pushed through the seal and connector prior to crimping the terminal. Cable seals are inserted into the shell of the connector and hold many wires. Use the following instructions for terminal installation:
- Push the cable through the correct cavity of the seal and connector. See Figure
"Inserting Wire Connector"
.

Figure 2. Inserting Wire Connector
- Strip the end of the cable using wire strippers to leave 5.0 mm ± 0.5 (0.20 in. ± 0.02) of bare conductor.
- Squeeze the handles of the crimping tool together firmly to cause the jaws to automatically open.
- Hold the "wire side" facing you.
- Insert the terminal until the wire attaching portion of the terminal rests on the 20-22 anvil. Ensure the wire core wings and the insulation wings of the terminal are pointing toward the upper jaw of the crimping tool. See Figure
"Terminal and Crimping Tool Position"
.

Figure 3. Terminal and Crimping Tool Position
- Insert the cable into the terminal until the stripped portion is positioned in the wire core wings, and the insulation portion ends just forward of the insulation wings. See Figure
"Cable to Terminal Alignment"
.

Figure 4. Cable to Terminal Alignment
- Compress the handles of the crimping tool until the ratchet automatically releases and the crimp is complete.
Note: For faster, more efficient crimping operation, a bracket or bench rest may be used to cradle one handle of the tool. The operator can apply the terminals by grasping and actuating only one handle of the tool. See Figure "Crimping Operation" .
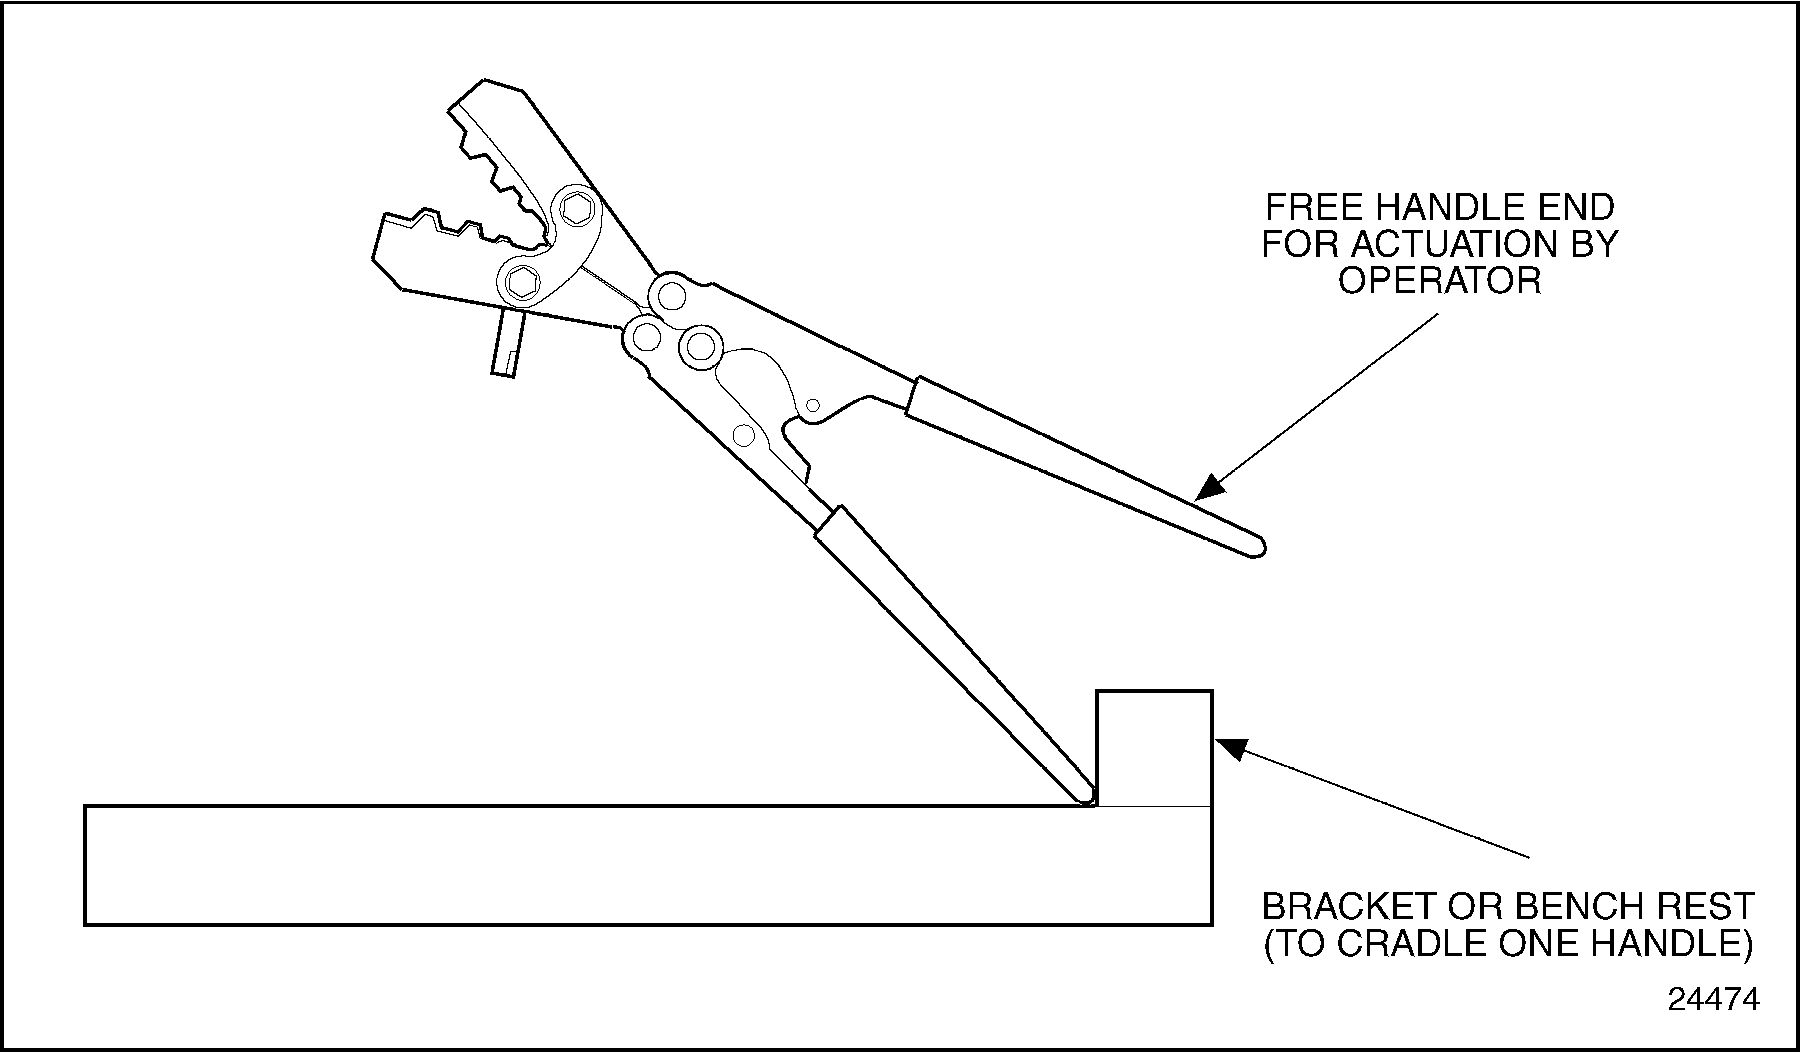
Figure 5. Crimping Operation
- Release the crimping tool with the lock lever located between the handles, in case of jamming.
- Align the locking tang of the terminal with the lettered side of the connector.
- Pull the cable back through the connector until a click is heard. See Figure
"Pulling the Terminal to Seat"
. Position the seal into the connector.
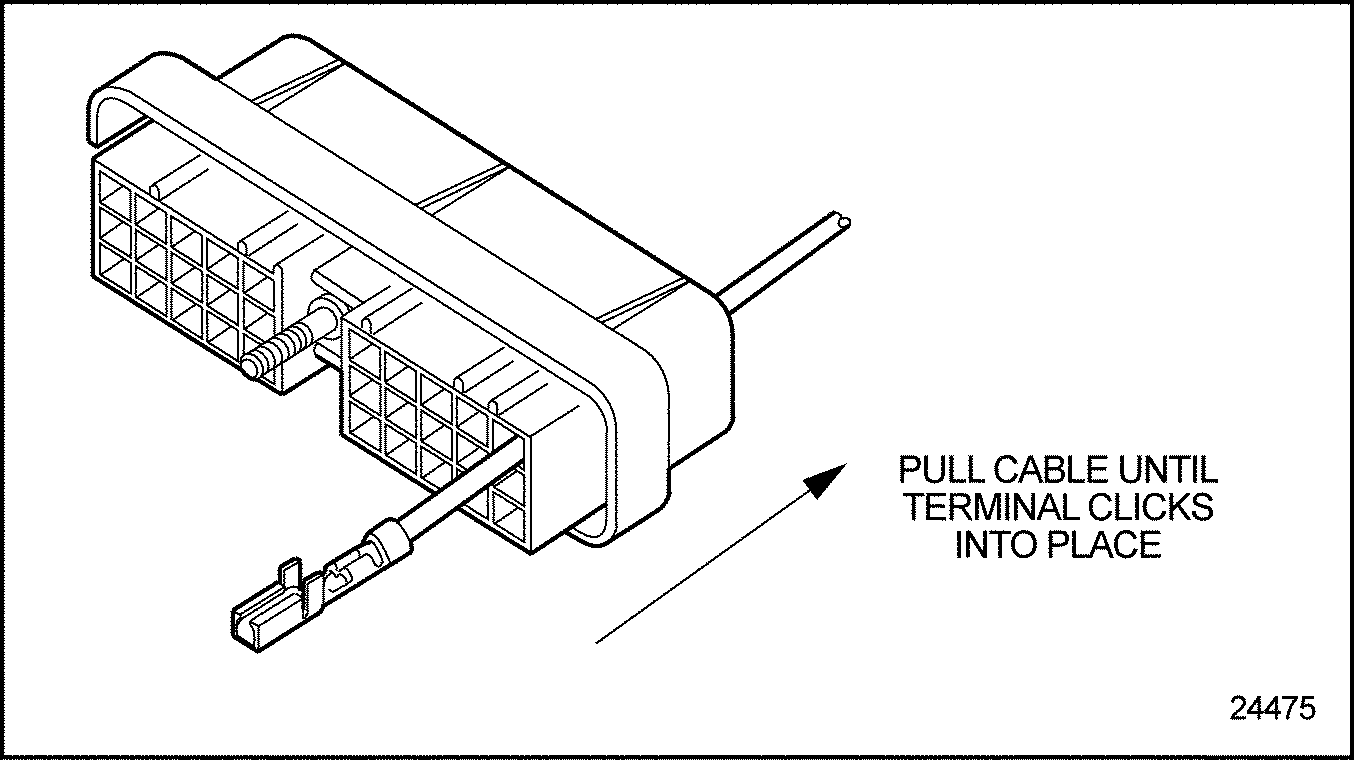
Figure 6. Pulling the Terminal to Seat
Note: For ECM 30-pin connectors, put locking tang opposite lettered side.
| Series 60 Service Manual - 6SE483 |
| Generated on 10-13-2008 |