Section 3.2
Oil Pan
The oil pan used on the Turbotronic 638 is made of stamped sheet metal. See Figure "Oil Pan Location" .

|
1.Oil Drain Plug |
3.Crankcase Breather Oil Return Line |
|
2.Crankcase Breather |
4.Oil Pan |
Figure 1. Oil Pan Location
Section 3.2.1
Repair or Replacement of Oil Pan
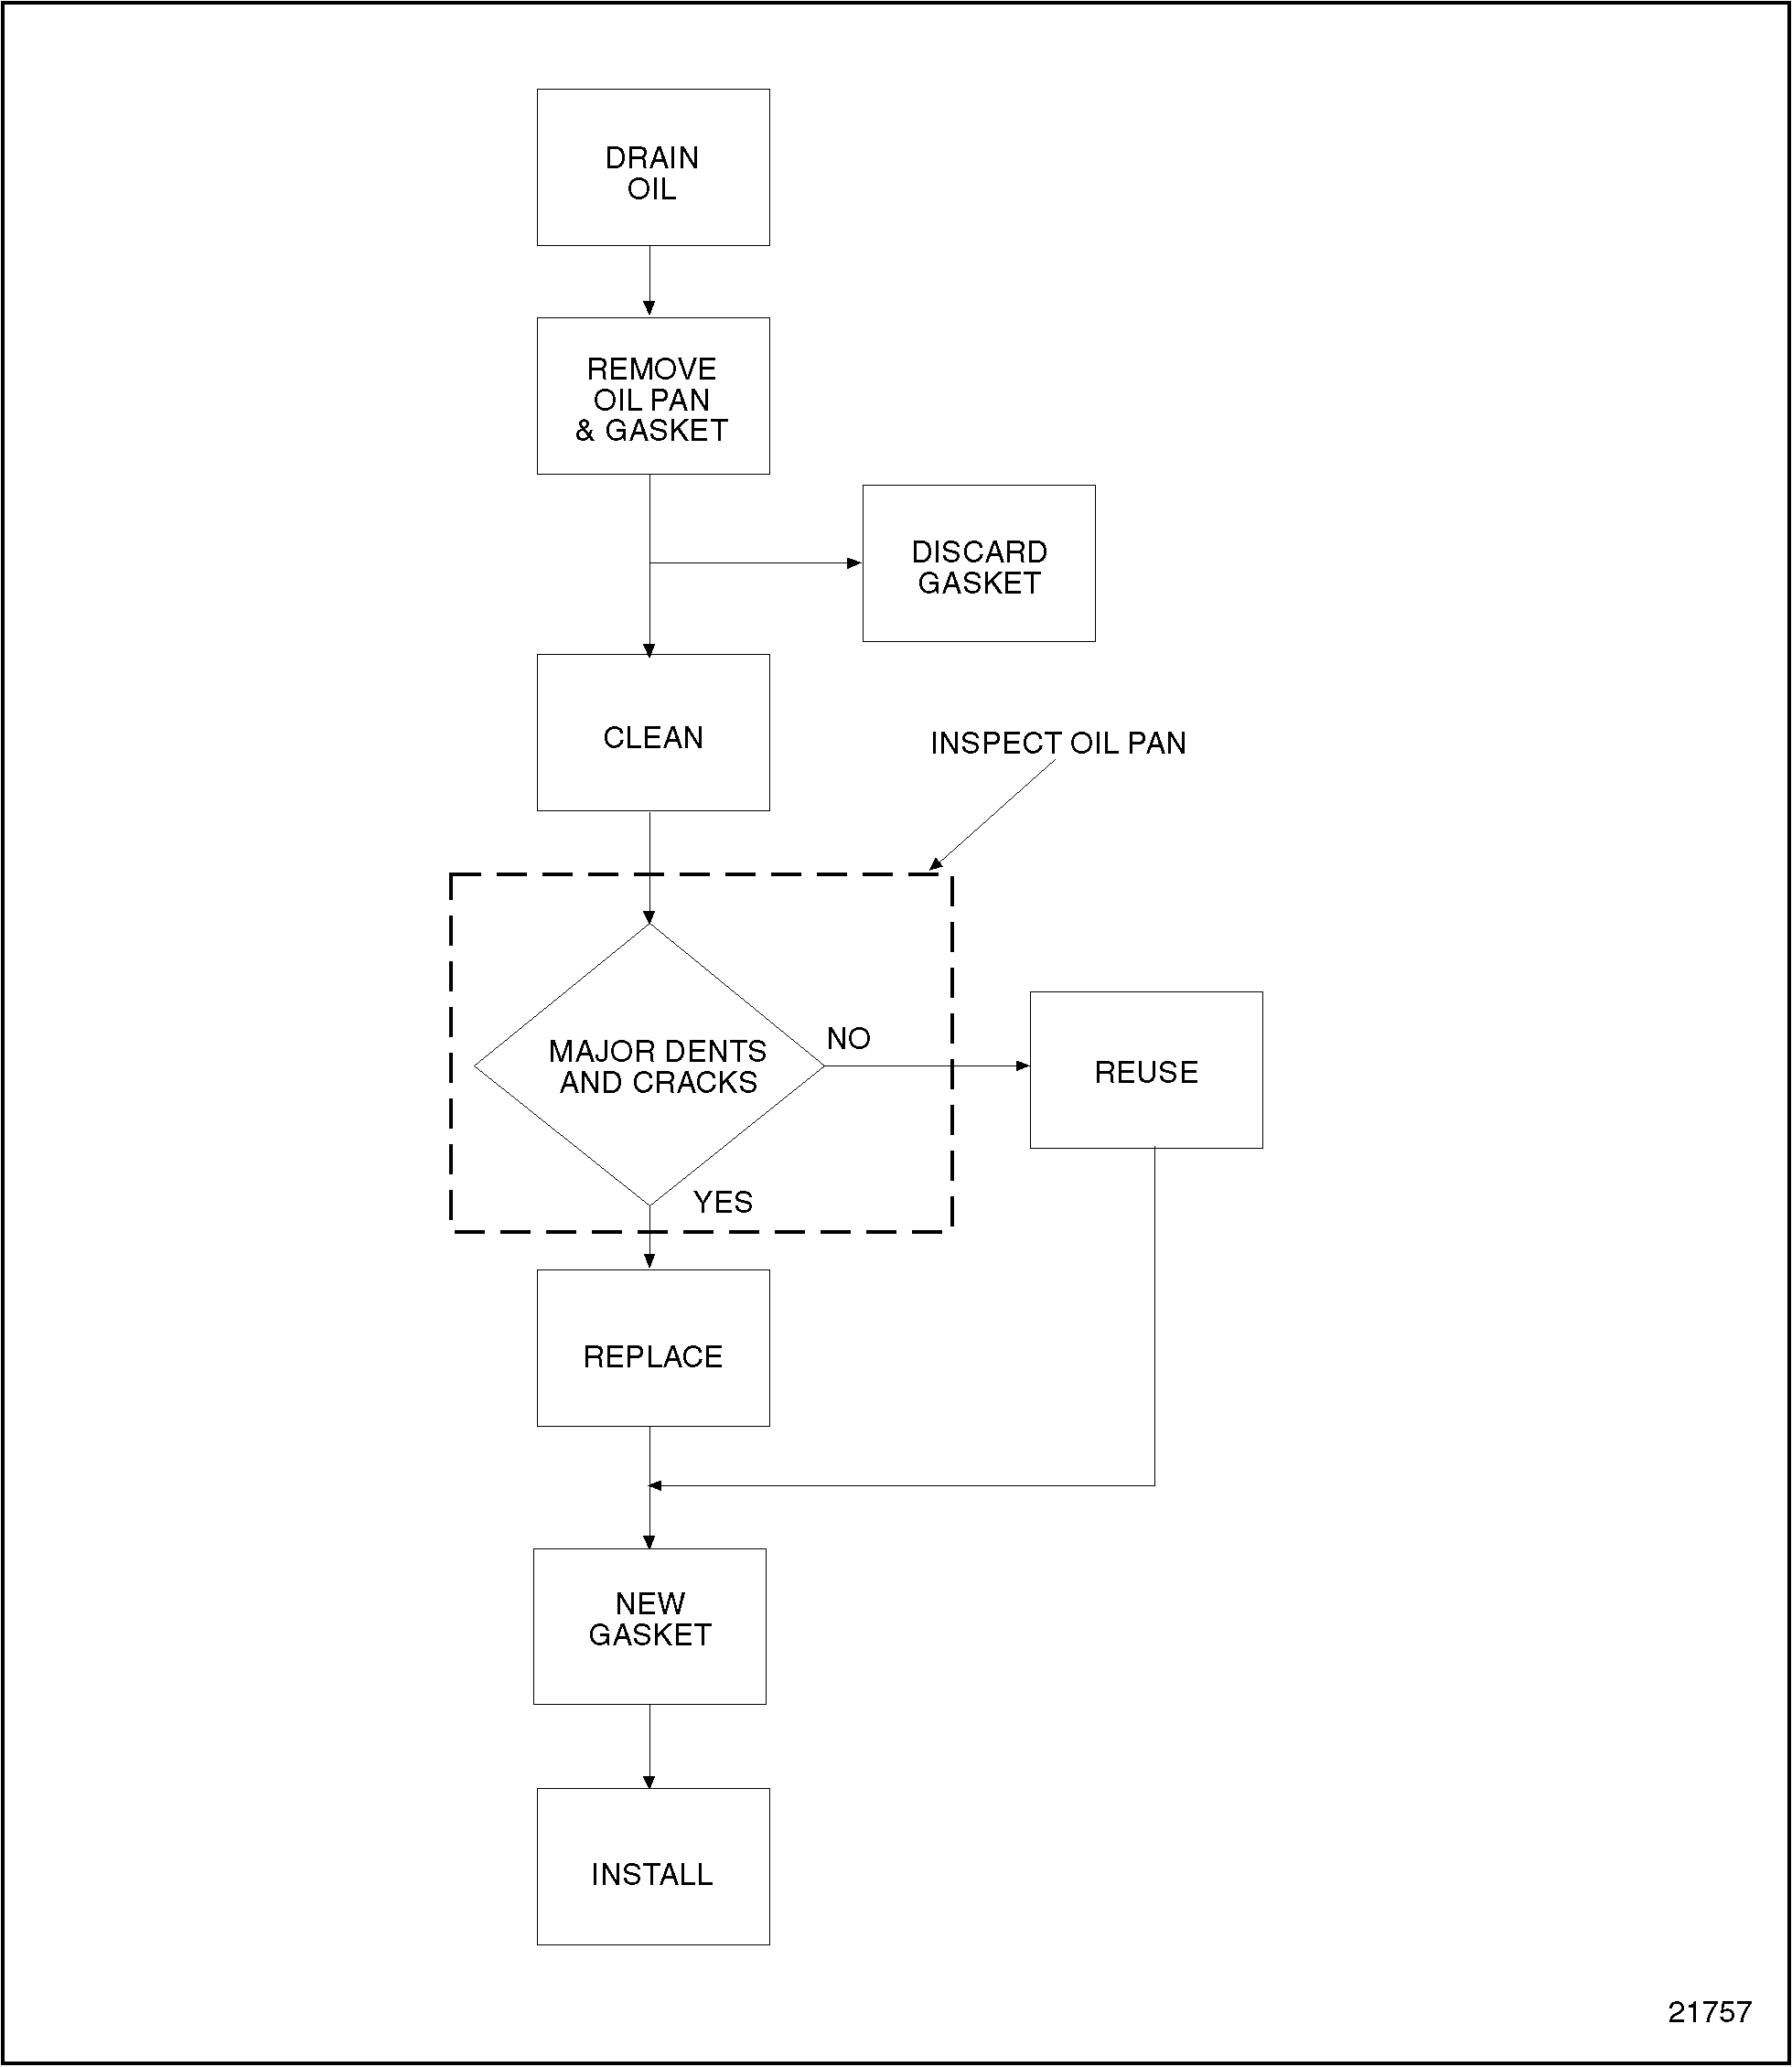
To determine if repair or replacement of the oil pan is necessary, perform the following procedure. See Figure "Flowchart for Repair or Replacement of Oil Pan" .

Figure 2. Flowchart for Repair or Replacement of Oil Pan
Section 3.2.2
Removal of Oil Pan
Precleaning of the oil pan is not required prior to removal.
Remove the oil pan as follows:
- Remove drain plug and drain the engine oil.
- Remove the crankcase breather oil return line. See Figure
"Crankcase Breather Oil Return Line Removal"
.

1.Oil Drain Plug
3.Crankcase Breather Oil Return Line
2.Crankcase Breather
4.Oil Pan
Figure 3. Crankcase Breather Oil Return Line Removal
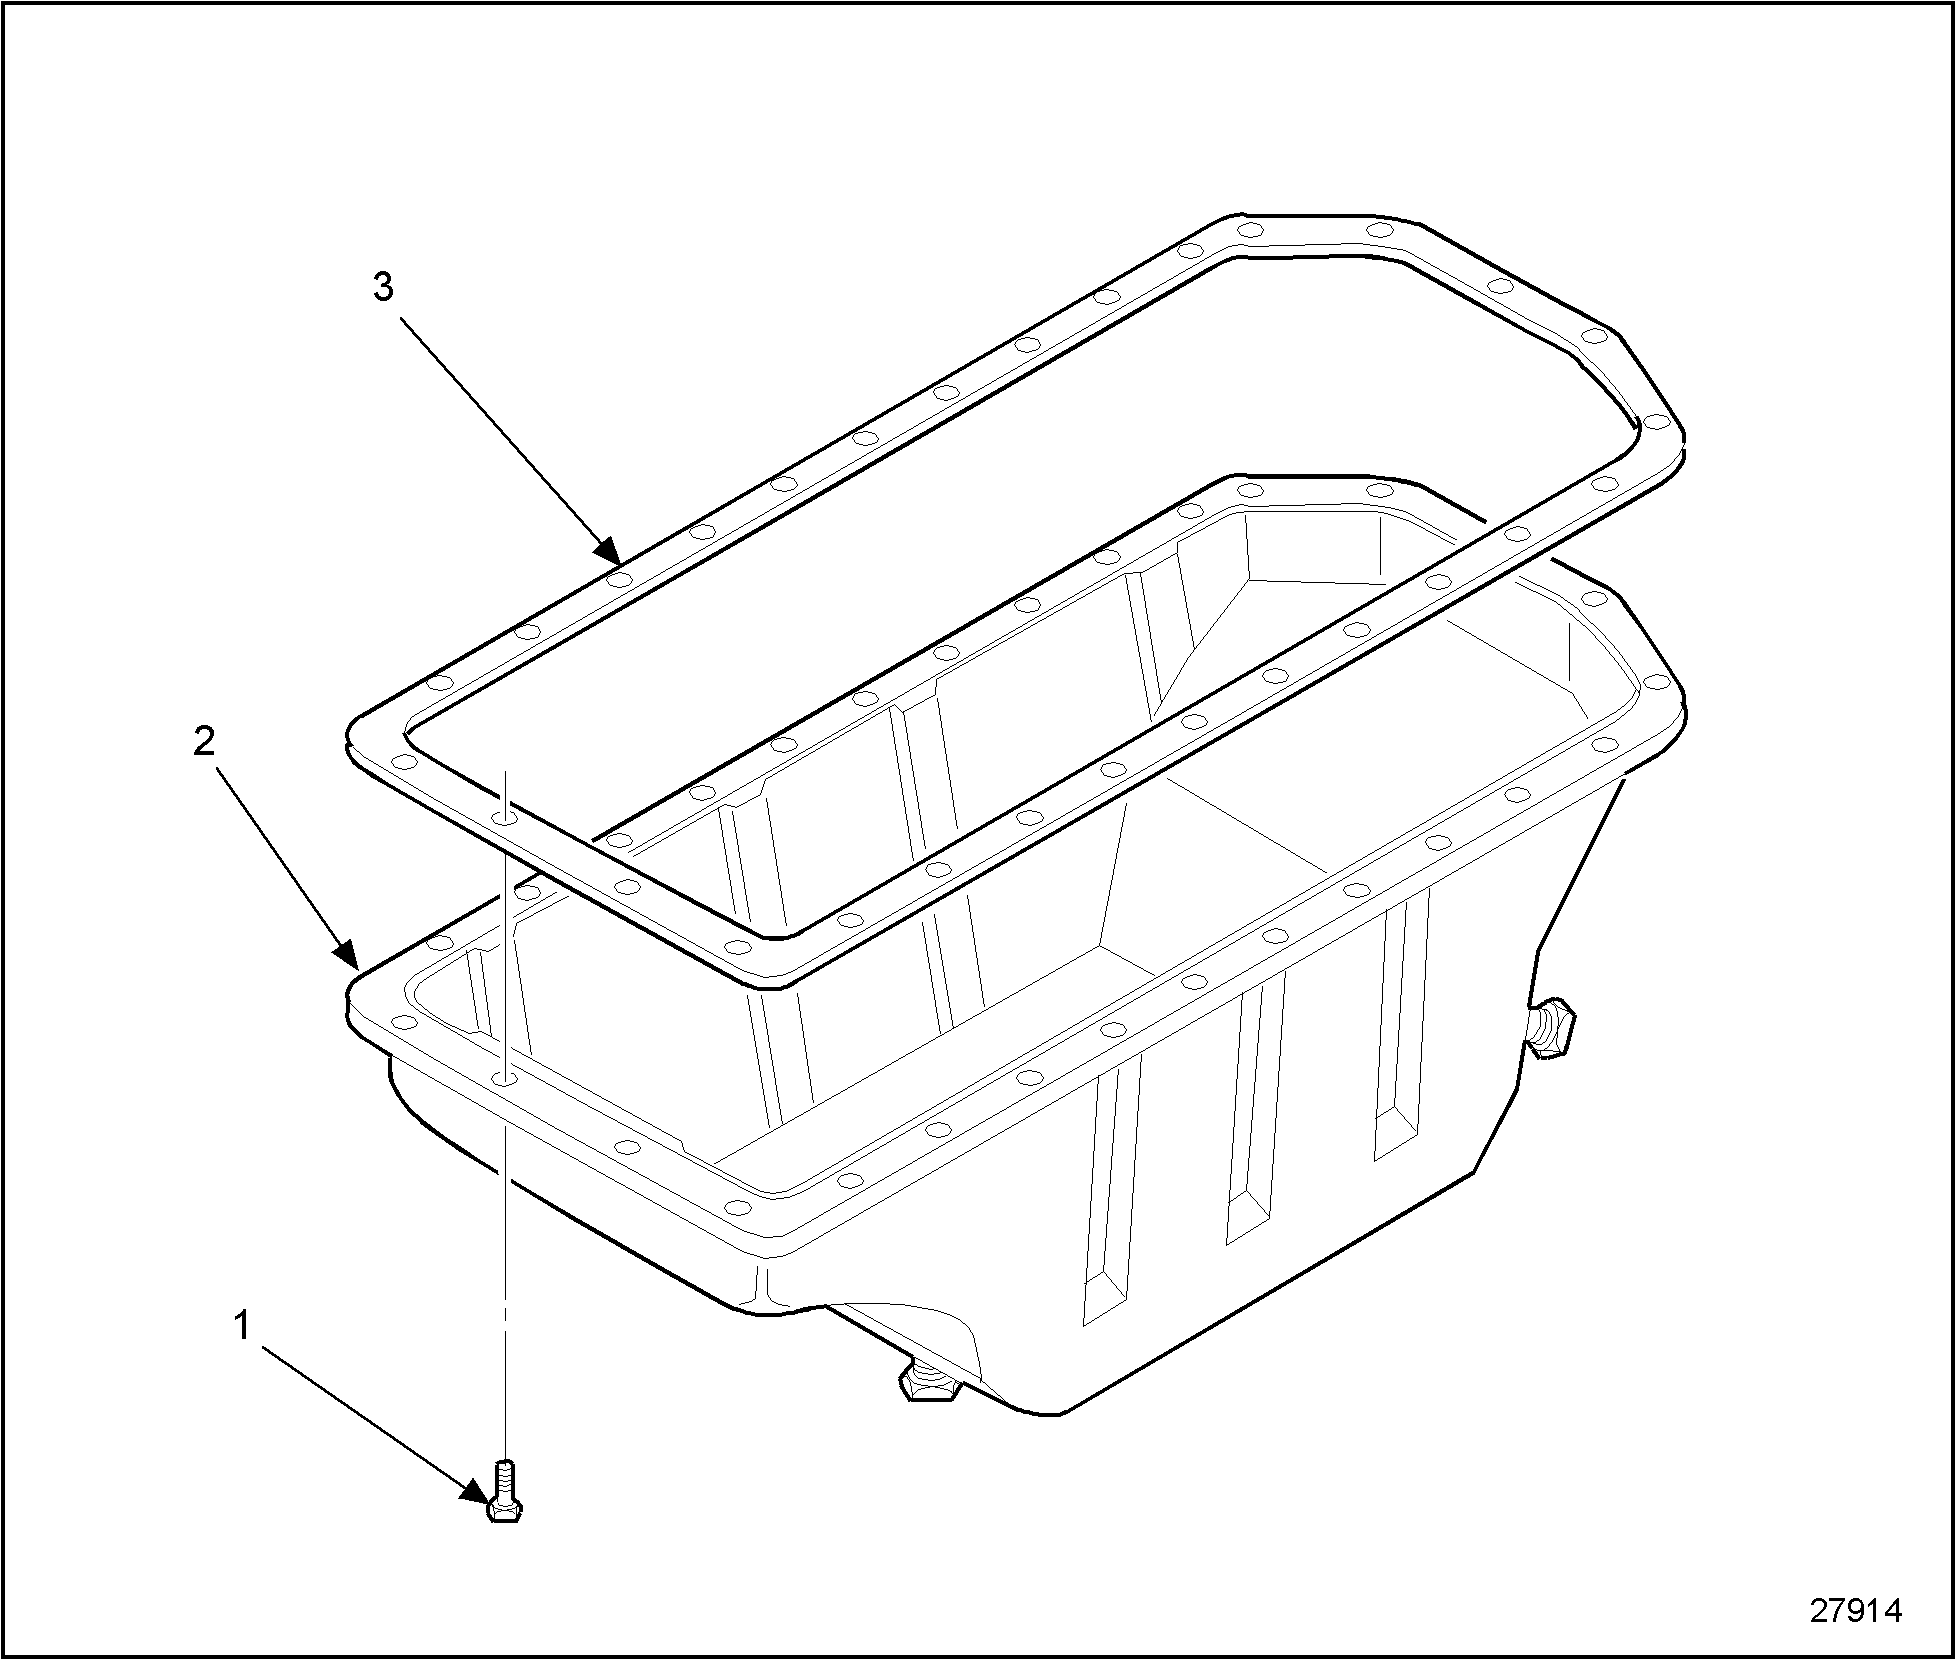
- Remove 29 Torx head bolts securing the oil pan to cylinder block. See Figure
"Torx Head Bolt Removal"
.

1.Torx Head Bolt (29)
3.Oil Pan Gasket
2.Oil Pan
Figure 4. Torx Head Bolt Removal
- Remove oil pan and gasket. See Figure
"Torx Head Bolt Removal"
.
Note: Use care not to deposit used gasket material into the crankcase.
Section 3.2.2.1
Cleaning of Oil Pan
Clean the oil pan as follows:
|
|
|
To avoid personal injury when blow drying, wear adequate eye protection (safety glasses or face plate) and do not exceed 276 kPa (40 lb/in. 2 ) air pressure. |
- Clean the oil pan and attaching hardware with clean fuel oil, and dry with compressed air.
- Clean the surfaces of the cylinder block where they mate with the oil pan.
Section 3.2.2.2
Inspection of Oil Pan
Inspect the oil pan as follows:
- Visually inspect the oil pan for dents and cracks.
- If the oil pan has dents or cracks, replace the oil pan. Refer to "3.2.3 Installation of Oil Pan" .
- If the oil pan has no dents or cracks, reuse the oil pan. Refer to "3.2.3 Installation of Oil Pan" .
Section 3.2.3
Installation of Oil Pan
Install the oil pan as follows:
- Apply a thin coat of RTV to the cylinder block.
- Install the oil pan with a new gasket onto the cylinder block. See Figure
"Oil Pan and Gasket Installation"
.

1.Torx Head Bolt (29)
3.Oil Pan Gasket
2.Oil Pan
Figure 5. Oil Pan and Gasket Installation
- Install and tighten the 29 Torx head bolts. Torque the bolts to 13 N · m (10 lb · ft).
- Install the crankcase breather oil return line to the oil pan. See Figure
"Crankcase Breather Line Installation"
.

1.Crankcase Breather
4.Banjo Connector
2.Clip Hose
5.Washer
3.Crankcase Breather Oil Return Line
6.Banjo Bolt
Figure 6. Crankcase Breather Line Installation
- Install the drain plug and refill the engine crankcase with clean lube oil. Listed in Table "Recommended Engine Lubrication Oil" . The Turbotronic 638 crankcase holds 8.7 L (9 qts).
- Run the engine to verify repair.
| Series 638 Service Manual - 6SE648 |
| Generated on 10-13-2008 |