Section 6.3
E-Mailing Snapshot Files
E-mail a snapshot using the following procedure:
- Identify the filenames of snapshots to send. Typically the snapshot files a user creates are saved in the C:\Detroit Diesel\Diagnostic
folder. If this folder was used to store snapshots, view the snapshots available by going to Diagnostic Link
, opening up the Snapshot
drop-down menu, and selecting Open
. See Figure
"Snapshot Drop-Down Menu"
and Figure
"Available Snapshot Files from Diagnostic Link
"
.

Figure 1. Snapshot Drop-Down Menu

Figure 2. Available Snapshot Files from Diagnostic Link
- Write down the names of the files to send and close Diagnostic Link .
- Open up the file manager on the C:\
drive, and locate the Detroit Diesel
folder. See Figure
"Location of the Detroit Diesel Folder on the C:\ Drive"
.
Note: The user may choose a different location when the files are created so this location is not always used. The user can also do a search for file names using the snapshot file extension “.ddl” to locate all the snapshots on their computer.

Figure 3. Location of the Detroit Diesel Folder on the C:\ Drive
- Click on the +
sign in front of Detroit Diesel
. Two more folders appear. Click twice on the Diagnostic
folder. This folder is the default location of all the snapshot files for Diagnostic Link
. See Figure
"Location the Snapshot Files in the Diagnostic
Folder"
.

Figure 4. Location the Snapshot Files in the Diagnostic Folder
- Select the file or files to attach to the E-mail. If the files are not lined up as shown, go up to the View
drop-down menu in the file manager and choose Details
from the list. This view makes it easier to work with them. Click once with the left mouse button to select a file. To select more files, hold down the Control
key and click once more for each additional file. See Figure
"Selecting the Snapshot Files on the C:\ Drive"
.

Figure 5. Selecting the Snapshot Files on the C:\ Drive
- When all the snapshot files are highlighted, click once on one of the highlighted files with the right mouse button and a new menu will appear. Choose Copy
from the menu. See Figure
"Copying the Snapshot Files from the C:\ Drive"
. When the operation is complete, the menu will go away. The operations in the file manager are finished.
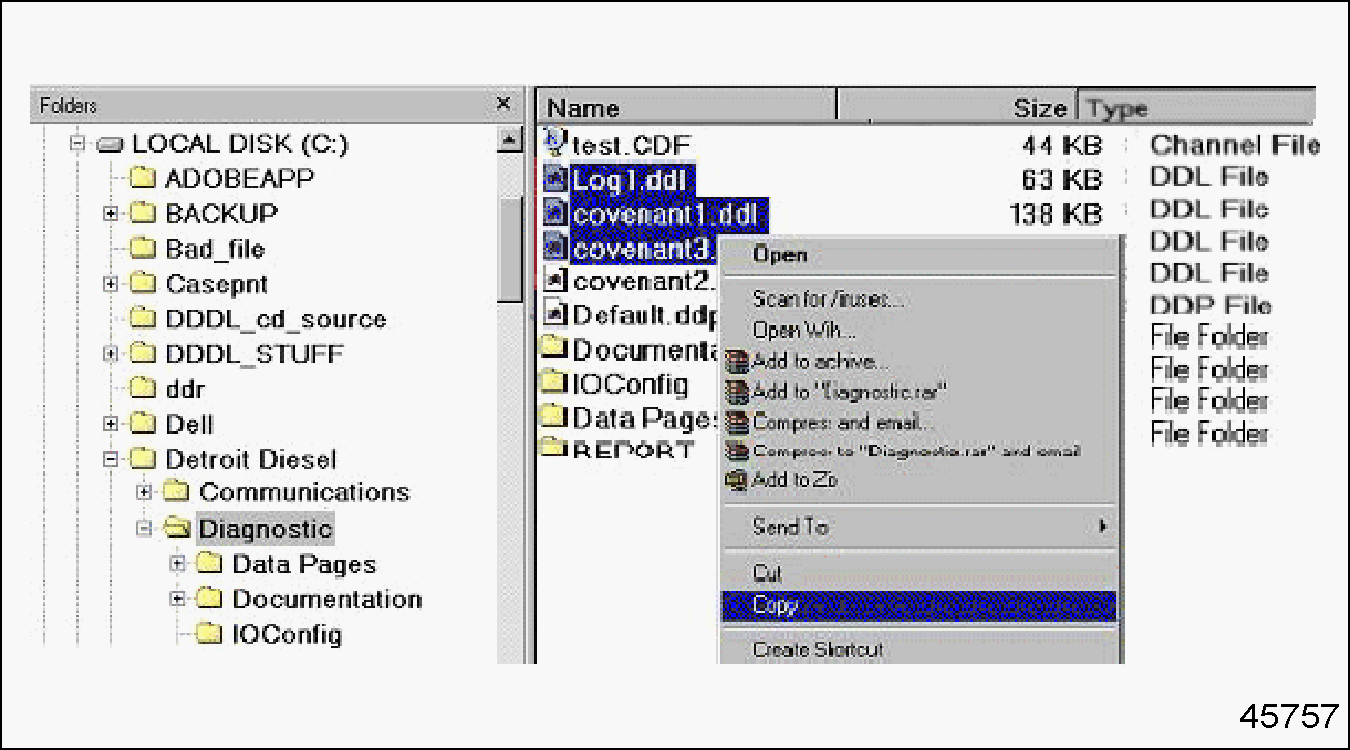
Figure 6. Copying the Snapshot Files from the C:\ Drive
- Open up the E-mail program and create a new E-mail message. Do a right mouse click on a blank area in the body of the E-mail and select Paste
from the menu. See Figure
"Pasting the Files in the E-mail Message"
.
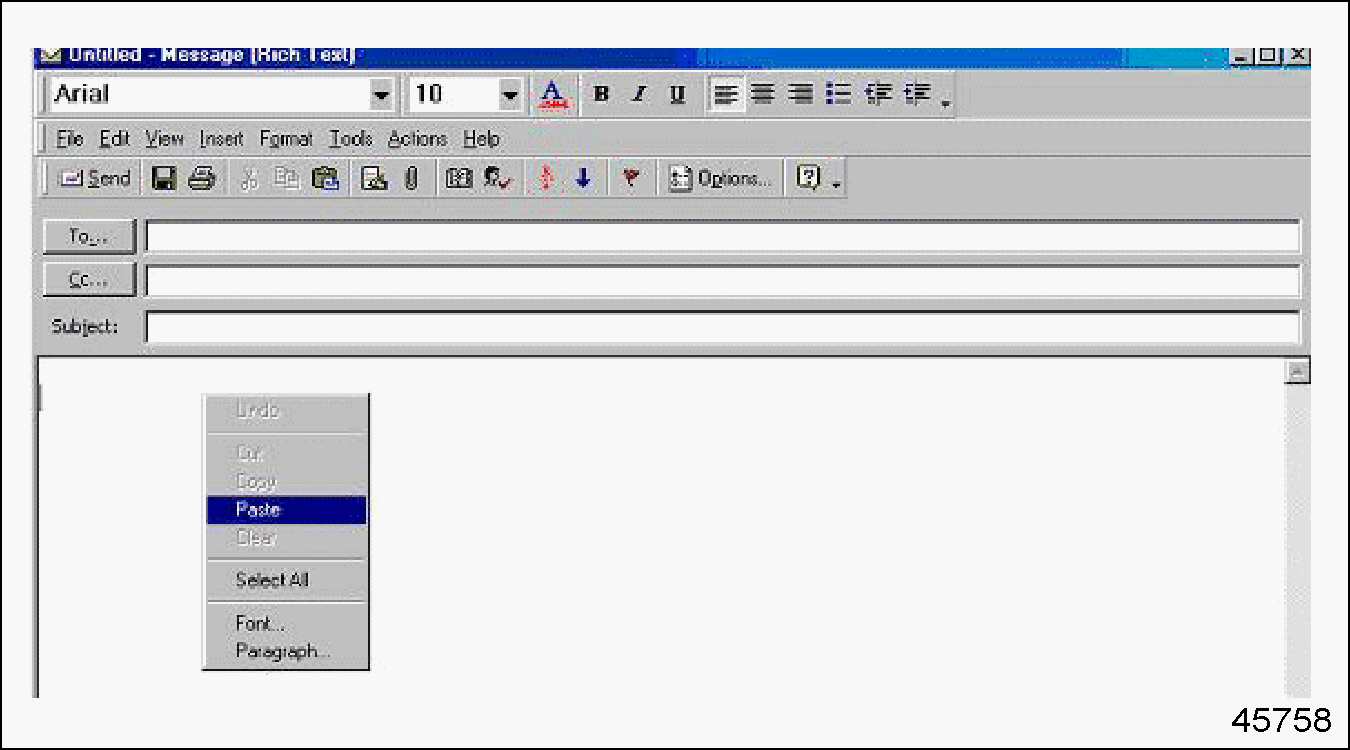
Figure 7. Pasting the Files in the E-mail Message
- The files are now attached in the body of the E-mail. Finish the message and address the E-mail. The E-mail is now ready to send the files. See Figure
"Pasting the Snapshot Files into the E-mail"
.
Note: The file name is the important thing, the icons associated with the DDL file may vary.

Figure 8. Pasting the Snapshot Files into the E-mail
- The receiver of the files just reverses the process in order to read them with Diagnostic Link
. See Figure
"Receiving the Snapshot Files from the E-mail Message"
.

Figure 9. Receiving the Snapshot Files from the E-mail Message
- Do a single right mouse click on each of the attached files and copy them from the E-mail to the C:\ Detroit Diesel\Diagnostic folder.
- Open up Diagnostic Link and choose the Open selection from the File drop-down menu. The files recently copied should appear in the list.
| MBE 900 and MBE 4000 EGR Technician's Manual - 7SE940 |
| Generated on 10-13-2008 |