Section 1.18
Cylinder Liner
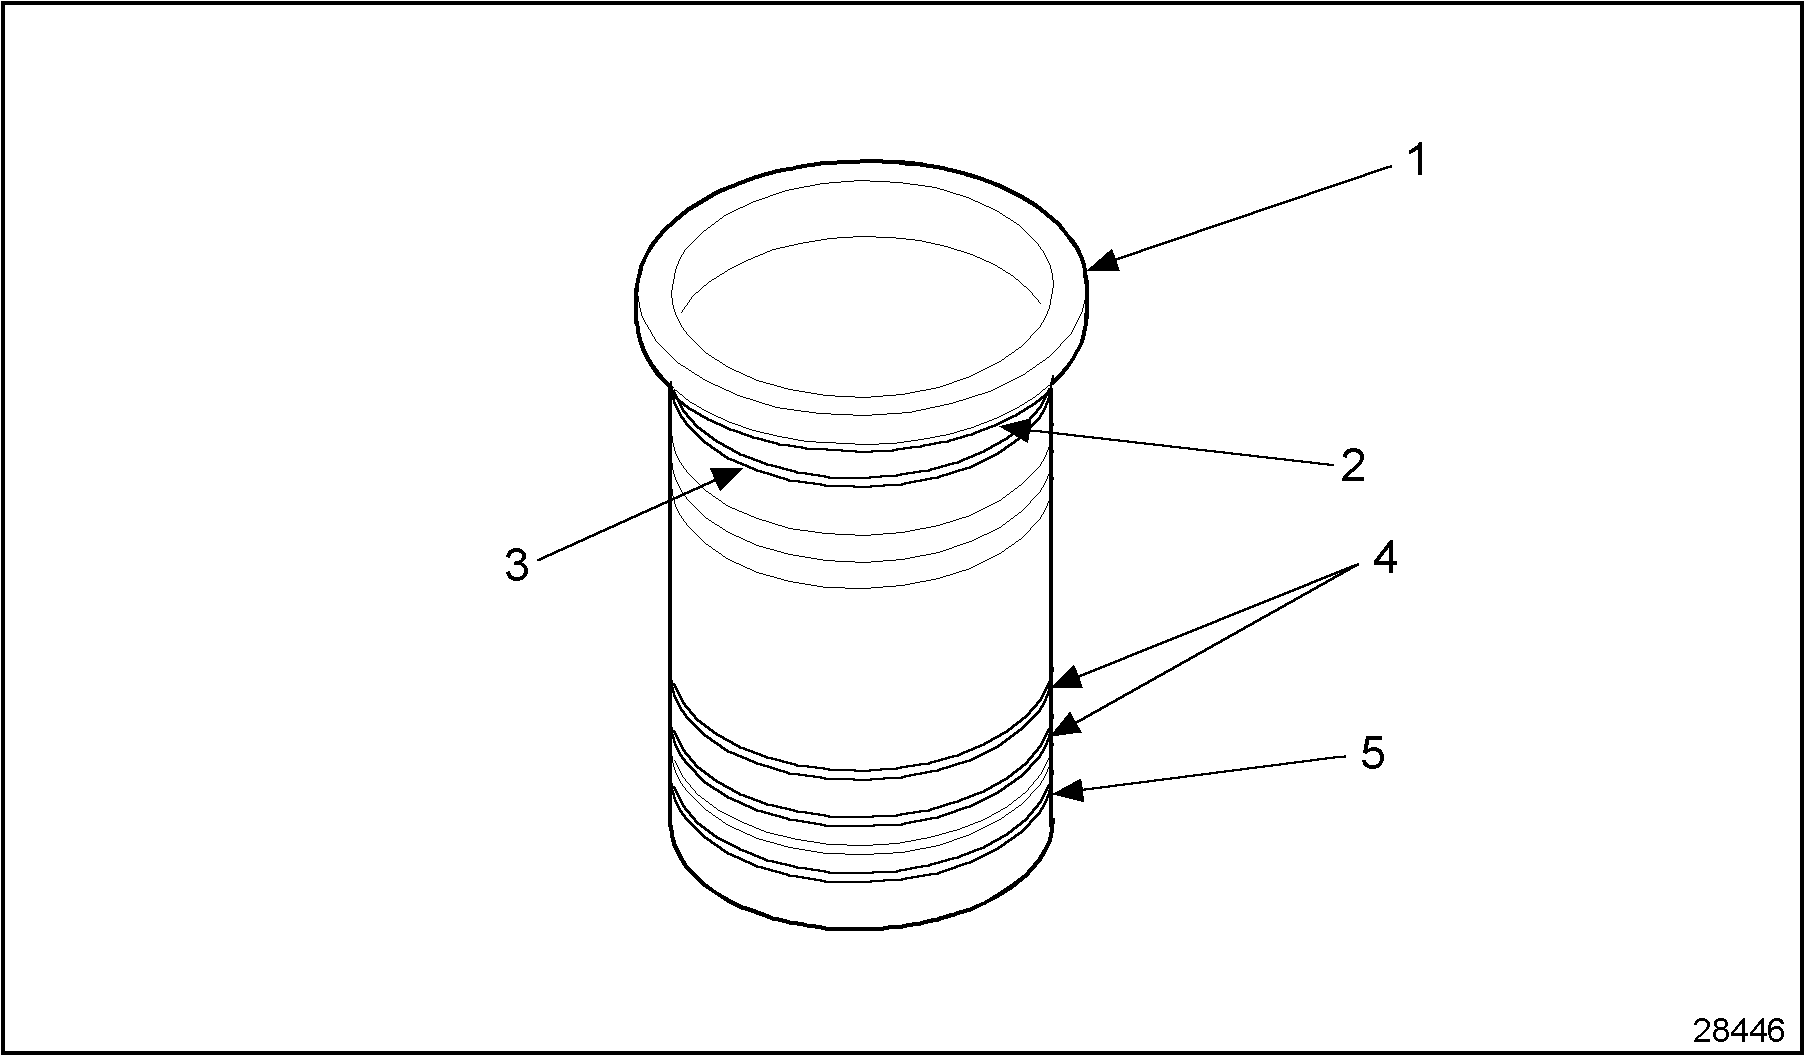
The Turbotronic 638 engine cylinder bores are not an integral part of the block casting, but are in the form of replaceable, wet type cylinder liners. See Figure "Cylinder Liner Parts Location" .
|
1.Cylinder Liner |
4.Thick Black Seal Ring (2) |
|
2.Shim |
5.Thick Orange Seal Ring |
|
3.Thin Orange Seal Ring |
|
Figure 1. Cylinder Liner Parts Location
Section 1.18.1
Replacement of Cylinder Liner
To determine if replacement of the cylinder liners is necessary, perform the following procedure. See Figure "Flowchart for Replacement of Cylinder Liner" .

Figure 2. Flowchart for Replacement of Cylinder Liner
Section 1.18.2
Removal of Cylinder Liner
Remove the cylinder liner as follows:
- Remove piston and connecting rod assembly. Refer to "1.9.2 Removal of Piston and Connecting Rod" .
- Using VM 1001, remove the cylinder liner(s). Repeat step 2
as necessary. See Figure
"Cylinder Liner Removal"
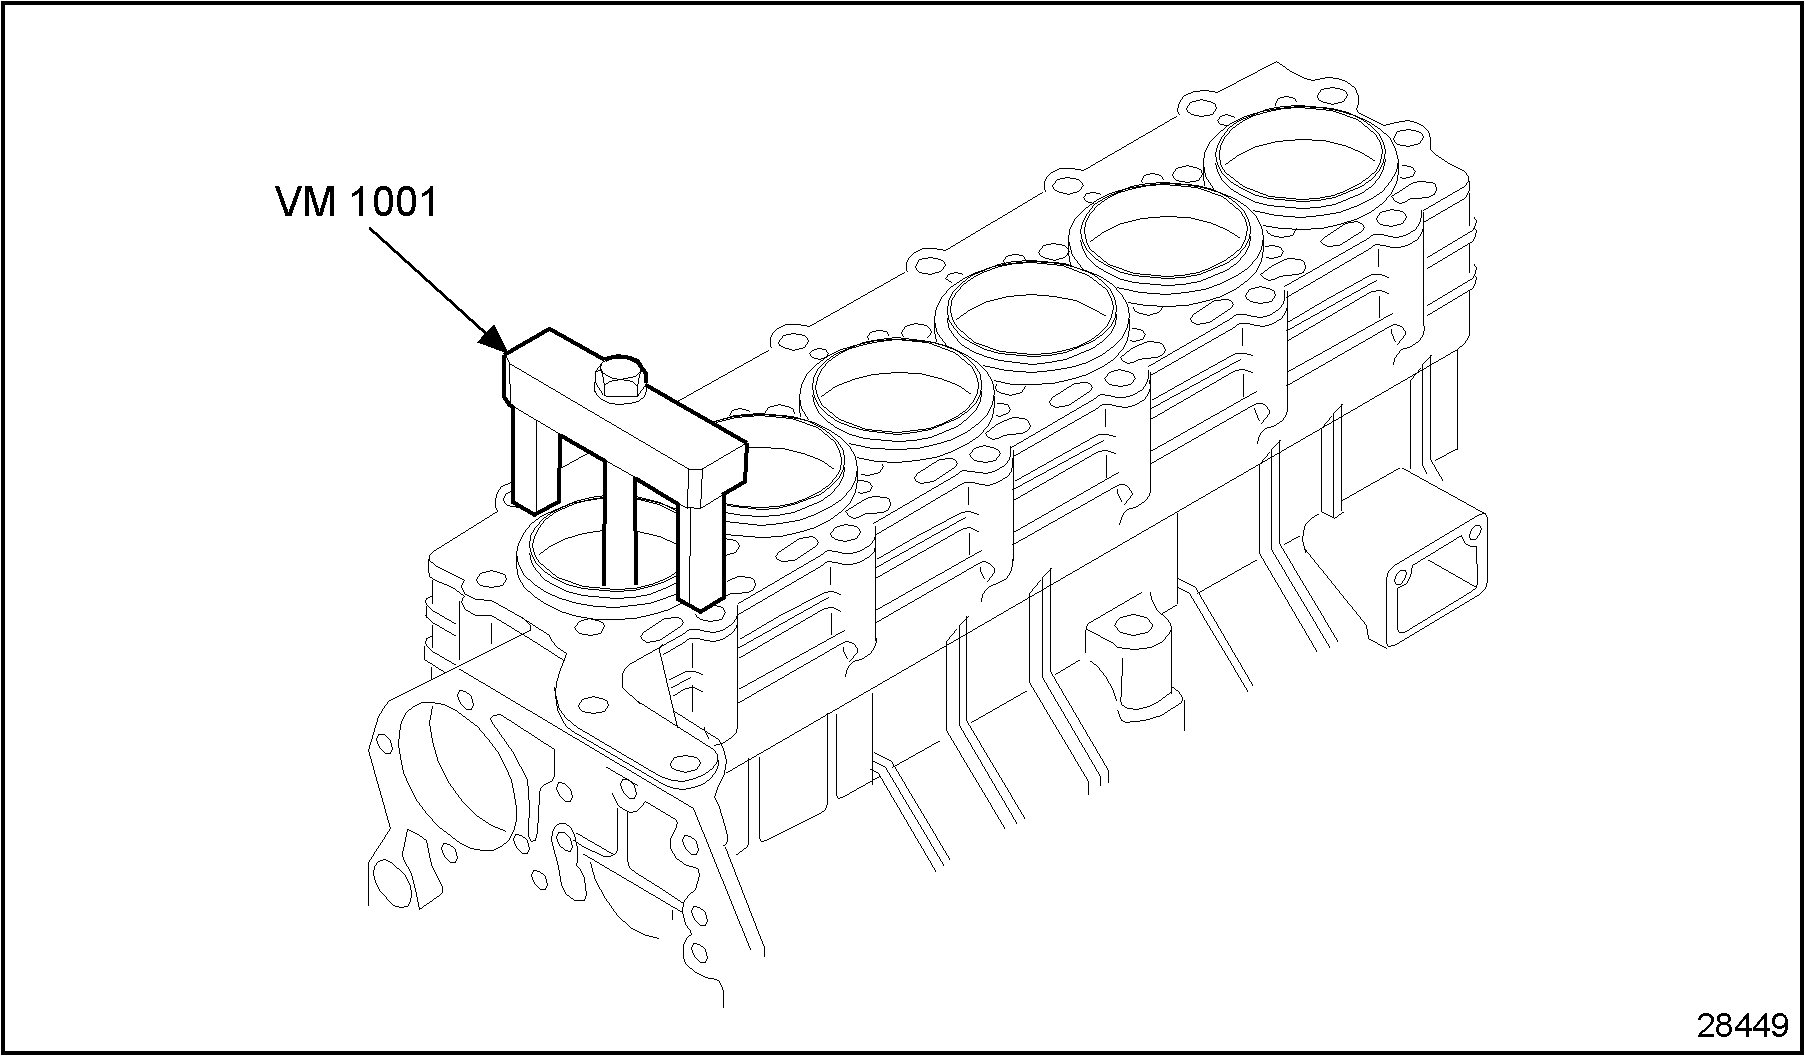
Figure 3. Cylinder Liner Removal
- Remove and discard seal rings.
Section 1.18.2.1
Cleaning of Cylinder Liner
Clean the cylinder liner as follows:
- Remove Loctite sealant material from around the cylinder liner flange.

To avoid personal injury when blow drying, wear adequate eye protection (safety glasses or face plate) and do not exceed 276 kPa (40 lb/in. 2 ) air pressure.
- Clean the cylinder liner with clean fuel oil and blow dry with compressed air.
Section 1.18.2.2
Inspection of Cylinder Liner
- Visually check the inside diameter surface of the cylinder liner for scratches.
- If the inside diameter of the cylinder liner is scratched, replace the component. Refer to "1.18.3 Installation of Cylinder Liner" .
- If the inside diameter of the cylinder liner is not scratched, proceed with step 2 of inspection.
- Visually check the cylinder liner for erosion.
- If the cylinder liner is eroded, replace the component. Refer to "1.18.3 Installation of Cylinder Liner" .
- If the cylinder liner is not eroded, proceed with step 3 of inspection.
- Visually check the outside diameter of the cylinder liner for cavitation.
- If the outside diameter of the cylinder has cavitation, replace the component. Refer to "1.18.3 Installation of Cylinder Liner" .
- If the outside diameter of the cylinder has no cavitation, proceed with step 4 of inspection.
- Measure the inside diameter of the cylinder liner. See Figure
"Inside Cylinder Liner Dimensions"
.
- If the measured inside diameter is not within 92.000-92.010 mm (3.6204-3.6224 in.), replace the cylinder liner. Refer to "1.18.3 Installation of Cylinder Liner" .
- If the measured inside diameter is within 92.000-92.010 mm (3.6204-3.6224 in.), reuse the cylinder liner. Refer to "1.18.3 Installation of Cylinder Liner" .

Figure 4. Inside Cylinder Liner Dimensions
Section 1.18.3
Installation of Cylinder Liner
Install the cylinder liner as follows:
- Install liners into their respective bore with no seal rings. See Figure
"Cylinder Liner Recess Depth"
.
Note: Ensure that the cylinder liner and cylinder liner bore area is free of dirt and debris. Also ensure that all Loctite® material has been removed.

1. Loctite 64040 Sleeve Retainer Application Area
6. Dial Gage
2. Shim
7. Lubricate Area for Cylinder Block
3. Thin Orange Seal Ring (1)
8. Cylinder Liner Rotation
4. Thick Black Seal Ring (2)
9. Loctite 64040 Sleeve Retainer Application Area
5. Thick Orange Seal Ring (1)
Figure 5. Cylinder Liner Recess Depth
Loctite® is a registered trademark of the Loctite Corporation.
- Position cylinder liners in the cylinder block and rotate by approximately 455 in both directions. See Figure "Cylinder Liner Recess Depth" .
- Using VM 1010, measure cylinder liner recess depth. Recess depth must be between 0.11-0.23 mm (0.0043-0.0090 in.). See Figure
"Cylinder Liner Recess Depth"
.
Note: Select shim for proper protrusion 0.01-0.06 mm (0.0003-0.00236 in.).
- Install shim and seal rings onto the cylinder liner. See Figure "Cylinder Liner Recess Depth" .
- Lubricate cylinder block with Polymer grease in the lower cylinder liner alignment area. See Figure
"Cylinder Liner Recess Depth"
.
Note: Do not lubricate seals on the cylinder liner.
- Apply a light bead of Loctite® 94040 sleeve retainer in the cylinder block and in the corner of the cylinder liner seat. See Figure "Cylinder Liner Recess Depth" .
- Apply a uniform layer of Loctite® 94040 sleeve retainer on the cylinder liner. See Figure "Cylinder Liner Recess Depth" .
- Fit the cylinder liner into the cylinder block and ensure that the shim is seated correctly against the cylinder block mating surface.
- Using cylinder head clamps and bolts, seat the cylinder liners in the cylinder block. Torque bolts to 49 N · m (36 lb · ft).
- Using a dial gage, measure the cylinder liner protrusion.
Note: Protrusion should be between 0.01-0.06 mm (0.0004-0.0024 in.).
Note: Ensure that cylinder liners remain clamped-down for the remainder of the assembly process.
- Install piston and connecting rod assemblies. Refer to "1.9.3 Installation of Piston and Connecting Rod" .
- Install cylinder heads. Refer to "1.4.3 Installation of Cylinder Head" .
- Run engine to verify repairs.
Note: Ensure that minimum of six hours has elapsed since the installation of the cylinder liner before starting the engine to allow full curing of the Loctite® sealer.
| Series 638 Service Manual - 6SE648 |
| Generated on 10-13-2008 |