Section 2.6
Protective Sleeve
Perform the following procedures for removal and installation of the protective sleeve.
Section 2.6.1
Protective Sleeve Removal
Remove the protective sleeve as follows:
|
HOT COOLANT |
|
To avoid scalding from the expulsion of hot coolant, never remove the cooling system pressure cap while the engine is at operating temperature. Wear adequate protective clothing (face shield, rubber gloves, apron, and boots). Remove the cap slowly to relieve pressure. |
- Drain the engine coolant into a clean container. If the coolant is clean, save it for later use.
- Remove the injector nozzle. Refer to "2.4.1 Fuel Injector Nozzle Removal" .
- Remove the protective sleeve from the cylinder head by performing the following steps:
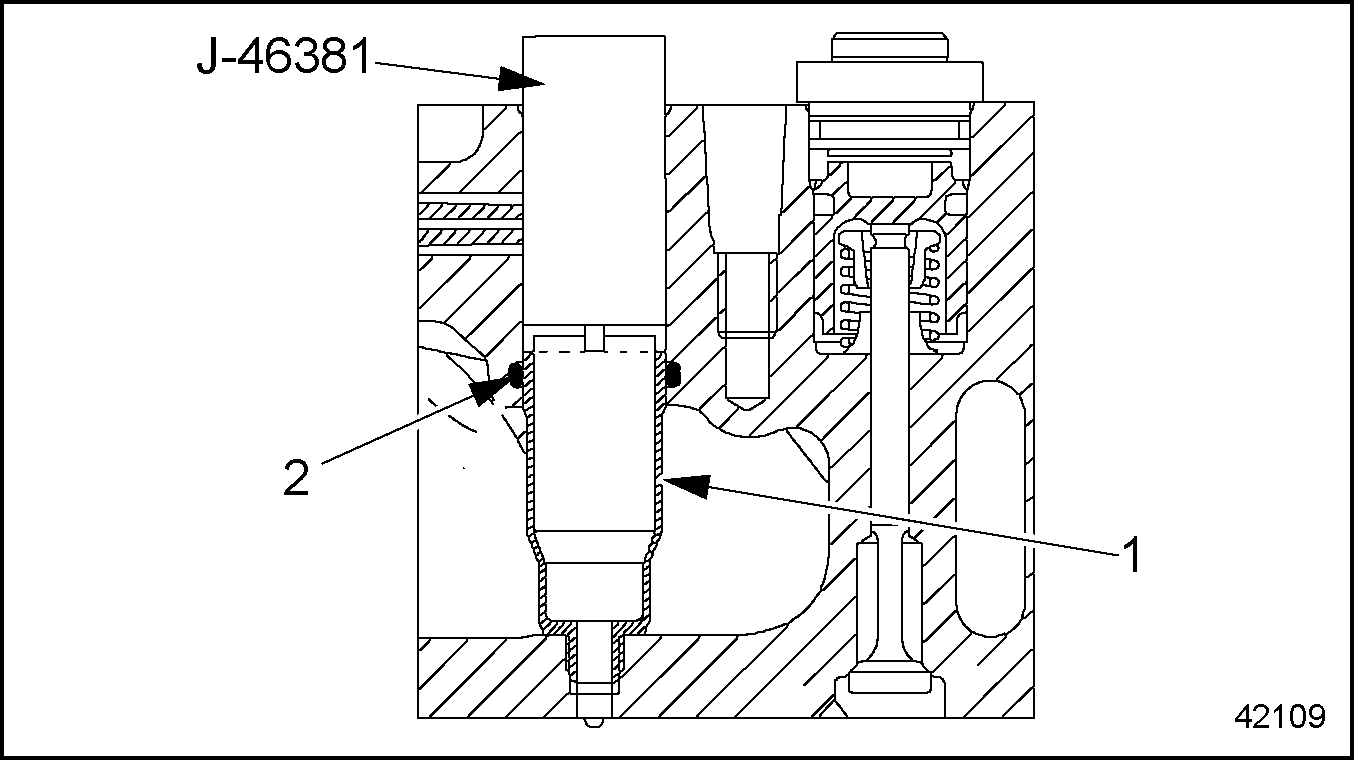
1. Protective Sleeve
2. O-ring
Figure 1. Removing the Protective Sleeve
- Insert the 4-toothed socket (J-46186) into the protective sleeve. Make sure the teeth of the socket engage the four openings on the protective sleeve. See Figure "Removing the Protective Sleeve" .
- Loosen the protective sleeve with a ratchet by turning in a counterclockwise direction until the threads of the sleeve are disengaged from the cylinder head.
- Insert the rubber-ended socket of the injector sleeve puller (J-46381) into the protective sleeve. Expand the rubber-ended socket by turning the handle on the tool counterclockwise. See Figure "Pulling the Protective Sleeve"
- Pull upward while rotating the injector sleeve puller
counterclockwise to remove it from the cylinder head.
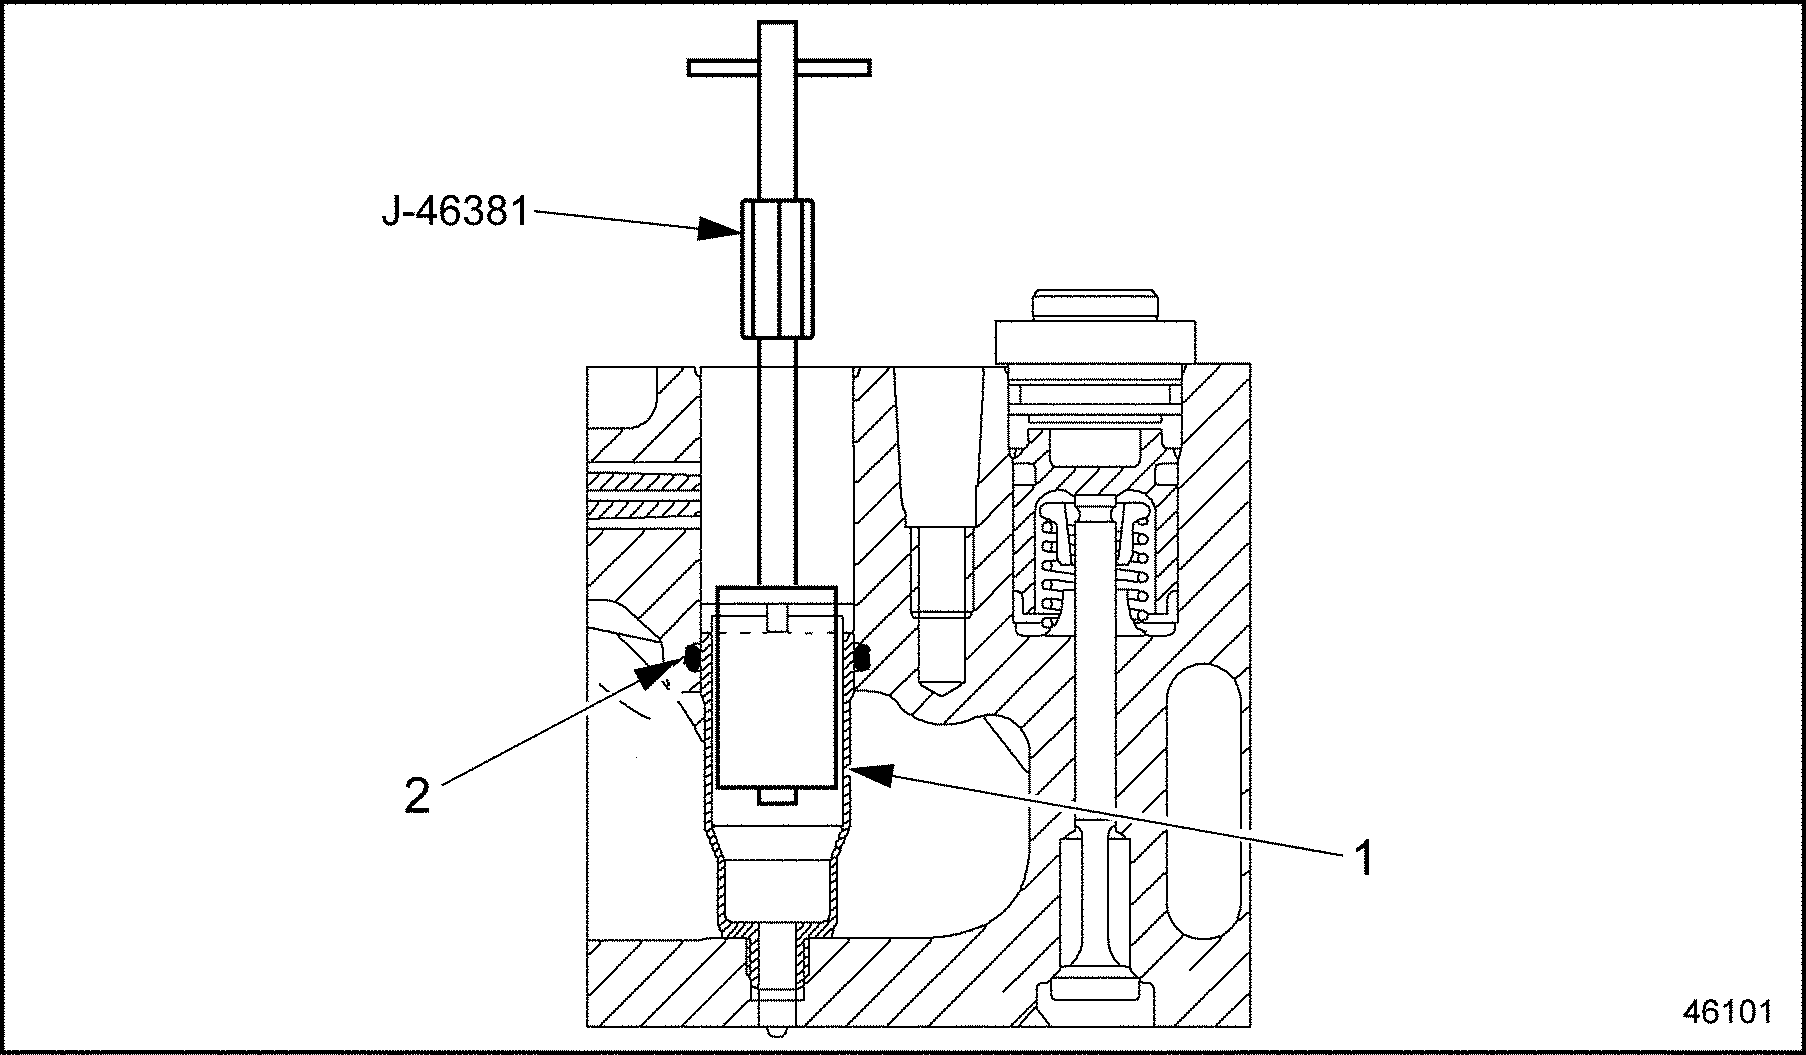
1. Protective Sleeve
2. O-ring
Figure 2. Pulling the Protective Sleeve
- Remove the O-ring from the cylinder head. See Figure
"Removing the O-ring"
.
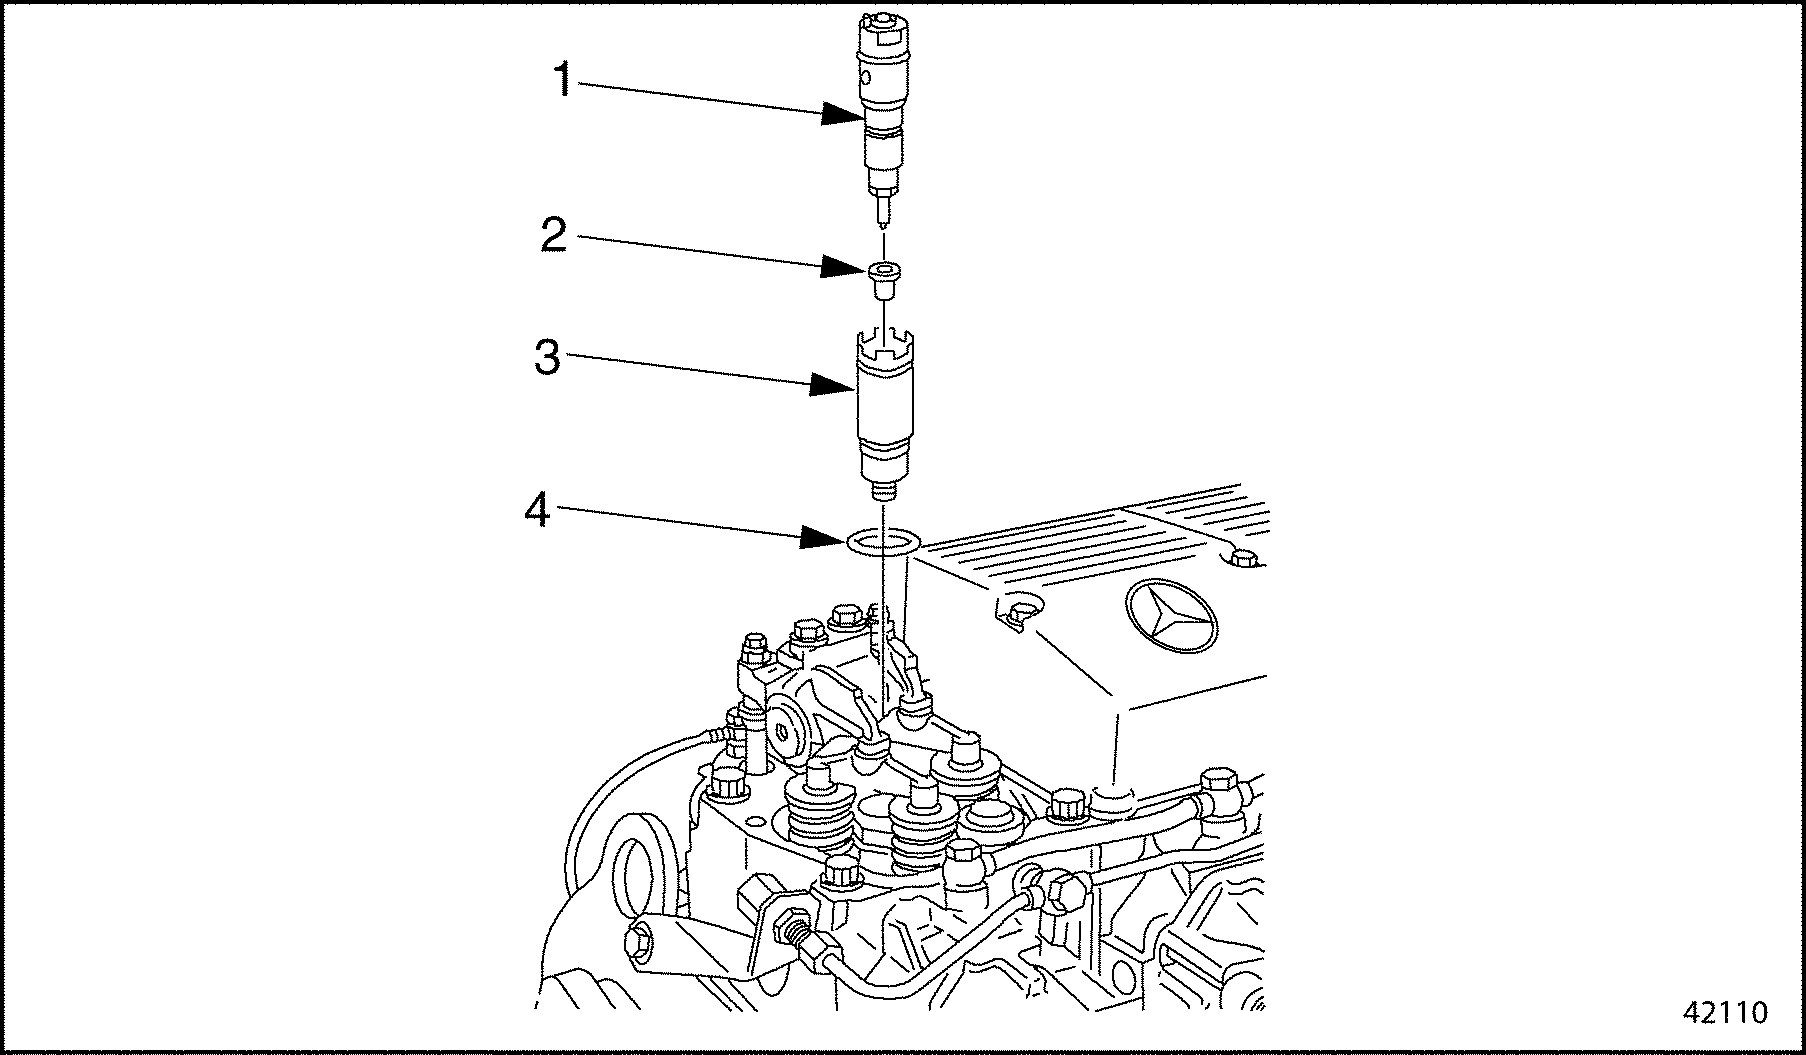
1. Nozzle
3. Protective Sleeve
2.Heat Isolator
4. O-ring
Figure 3. Removing the O-ring
Note: Replace the O-ring whenever the protective sleeve is removed.
Section 2.6.2
Protective Sleeve Installation
Install the protective sleeve as follows:
- Clean the sealing surfaces of the protective sleeve and the cylinder head.
- Lubricate the new O-ring with a light coating of engine oil. Install the O-ring in the cylinder head.
- Install the protective sleeve into the cylinder head. Using the 4-toothed socket (J-46186) and turning in a clockwise direction, torque the protective sleeve to 45 N·m (33 lb·ft).
- Install the nozzle. Refer to "2.4.2 Fuel Injector Nozzle Installation" .
- Check the coolant inhibitor level as follows:
- Dip the test strip into the coolant for one second, then remove it. Shake the strip vigorously to remove excess liquid.
- Immediately compare the end pad to the color chart on the container to determine the glycol concentration.
- Sixty-seconds (one minute) after dipping, compare the nitrite pad to the color chart on the container to determine the nitrite concentration.
- If the additive indicator (middle pad) shows any color change, this indicates the presence of an unauthorized inhibitor.
- If there is any doubt about the quality of the coolant, change the coolant.
- After each use, replace and tighten the cap on the test strip container. Discard any test strips that have turned light pink or tan in color.
- Fill the cooling system with the proper amount of coolant.
Use Detroit Diesel Power Trac ® 3–way Coolant Test Strips to measure nitrite and glycol concentrations. If the test indicates the coolant is acceptable reuse the coolant. If the test indicates the coolant is not within specifications, discard the coolant and replace with new.
Section 2.6.3
Crankshaft Position Sensor Replacement
Replace the crankshaft position sensor as follows:
- Disconnect the crankshaft position sensor electrical connector located on the rear of the flywheel housing. See Figure
"Crankshaft Position Sensor Installation"
.

1. Electrical Connector
3. Crankshaft Position Sensor
2. Camshaft Position Sensor
Figure 4. Crankshaft Position Sensor Installation
- Remove the sensor from the access hole in the flywheel housing.
- Install a new sensor in the flywheel housing. Push the sensor in until it is fully seated.
- Connect the electrical connector.
Note: Be sure that the correct electrical connector is connected to the sensor.
| MBE 4000 Service Manual - 6SE412 |
| Generated on 10-13-2008 |