Section 1.17
Piston and Rod Assembly
The piston and rod are serviced as an assembly.
Section 1.17.1
Repair or Replacement of Piston and Connecting Rod
To determine if repair is possible or replacement is necessary, perform the following procedure. See Figure "Repair or Replacement of Piston and Connecting Rod Flowchart" .

Figure 1. Repair or Replacement of Piston and Connecting Rod Flowchart
Section 1.17.2
Removal of Piston and Rod Assembly
Remove the piston and rod assembly as follows:
- Using a razor knife, scrape the carbon ridge from the top of the cylinder sleeve.
NOTICE:
To reduce the chance of piston ring land damage during removal, the carbon ring must be removed before removing the piston and rod assembly.
Note: Mark each connecting rod cap and re-assemble to the proper connecting rod upon removal. Mark the location of the connecting rod within the crankcase.
- Loosen the connecting rod bolts using a socket and breaker-bar. See Figure
"Loosen Connecting Rod Bolts"
.
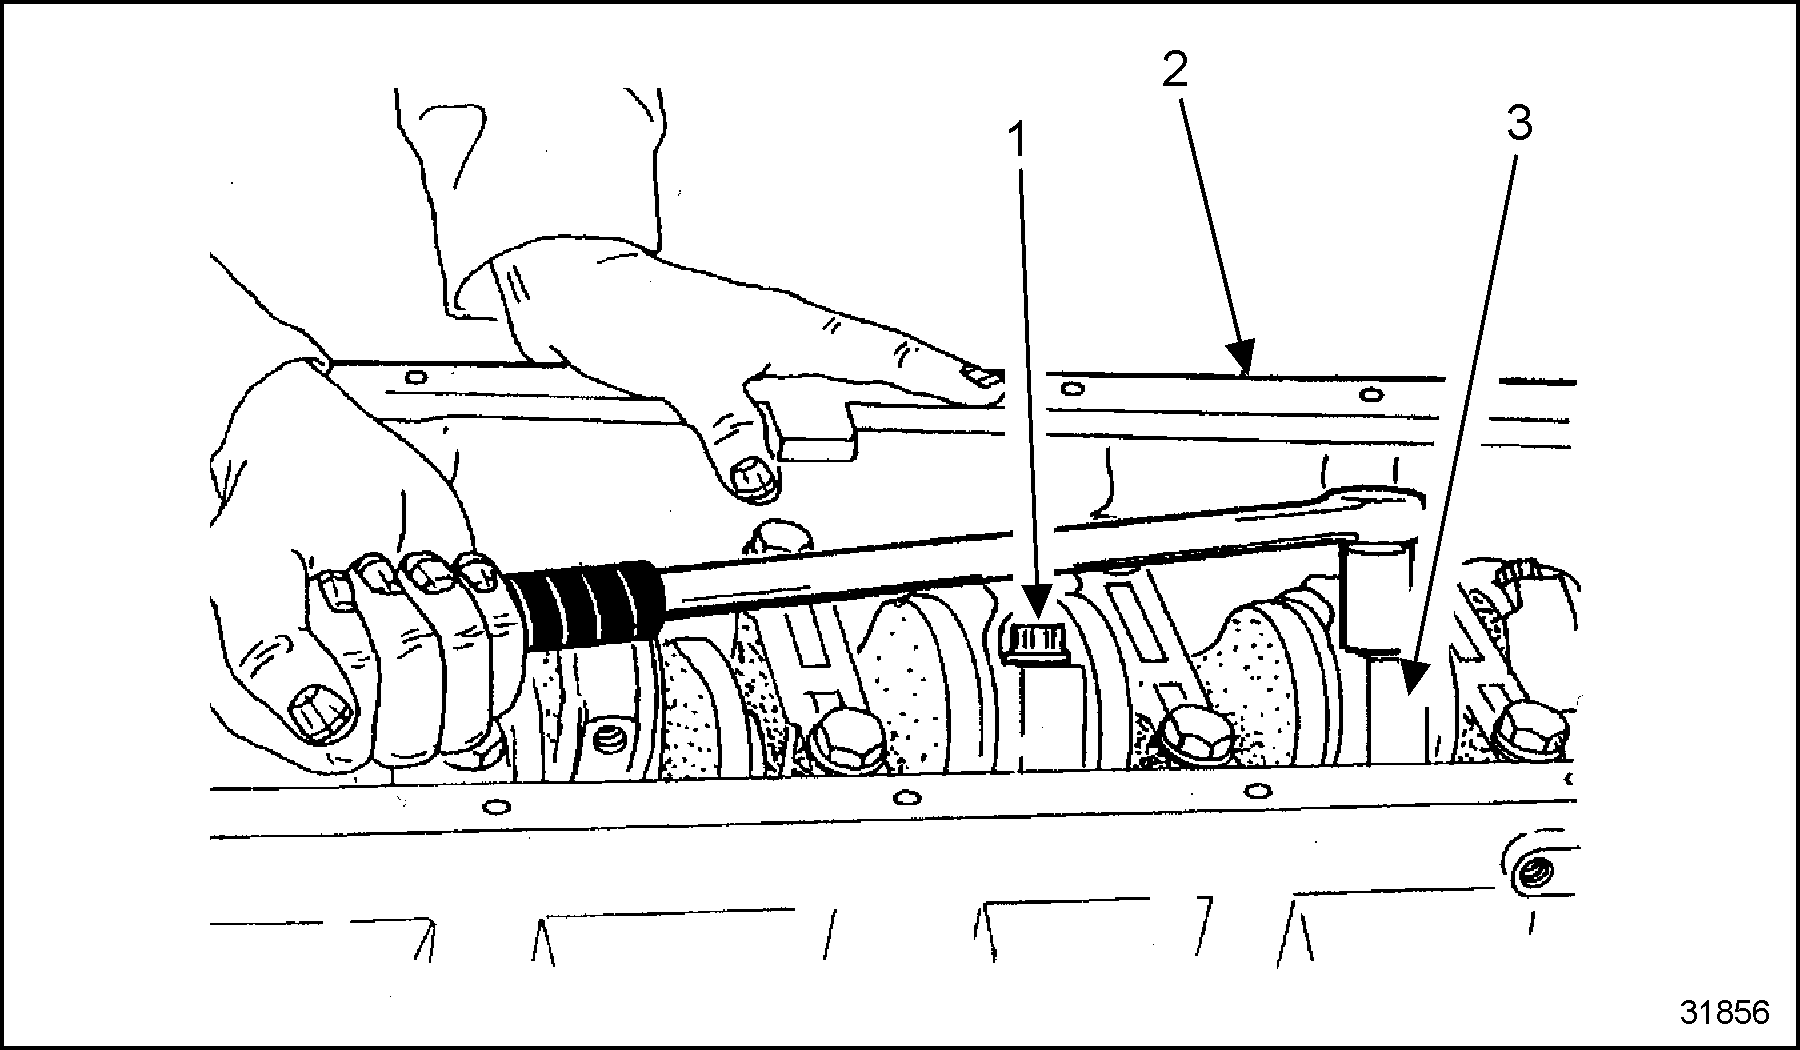
1. Connecting Rod Bolt (12)
3. Connecting Rod Cap (6)
2. Crankcase
Figure 2. Loosen Connecting Rod Bolts
- Remove the bolts by hand.
- Remove the connecting rod cap and bearing insert. See Figure
"Connecting Rod Cap Removal"
.
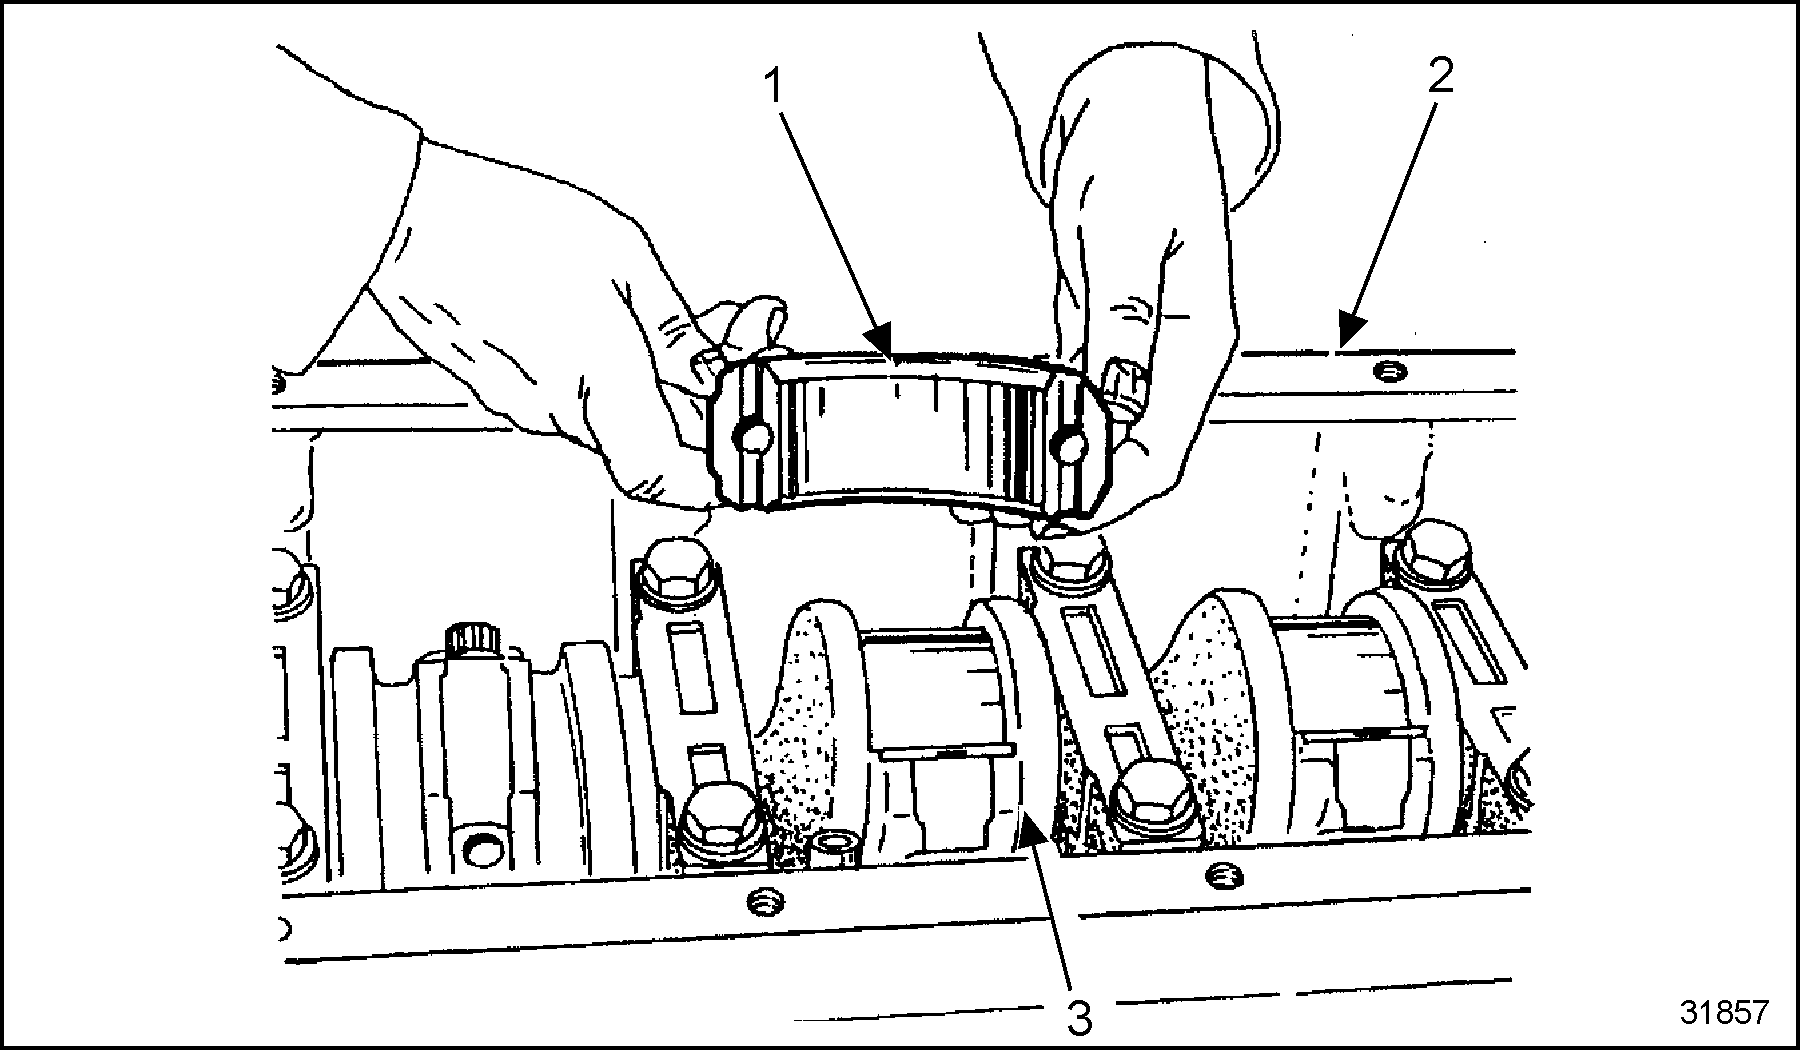
1. Connecting Rod Cap (6)
3. Crankshaft
2. Crankcase
Figure 3. Connecting Rod Cap Removal
- Remove the piston and connecting rod assemblies as follows:
- Rotate the engine in a vertical position, front end up.
- Push the piston and rod assembly from the cylinder bore using a wood or plastic handle.
- Once the piston rings are free of the cylinder bore, the assembly can be removed from the top of the crankcase.
- Match connecting rod and piston assemblies upon removal so they can be reinstalled in their respective cylinder bores.
Section 1.17.3
Disassembly of Piston and Rod Assembly
Disassemble the piston and rod assembly as follows:
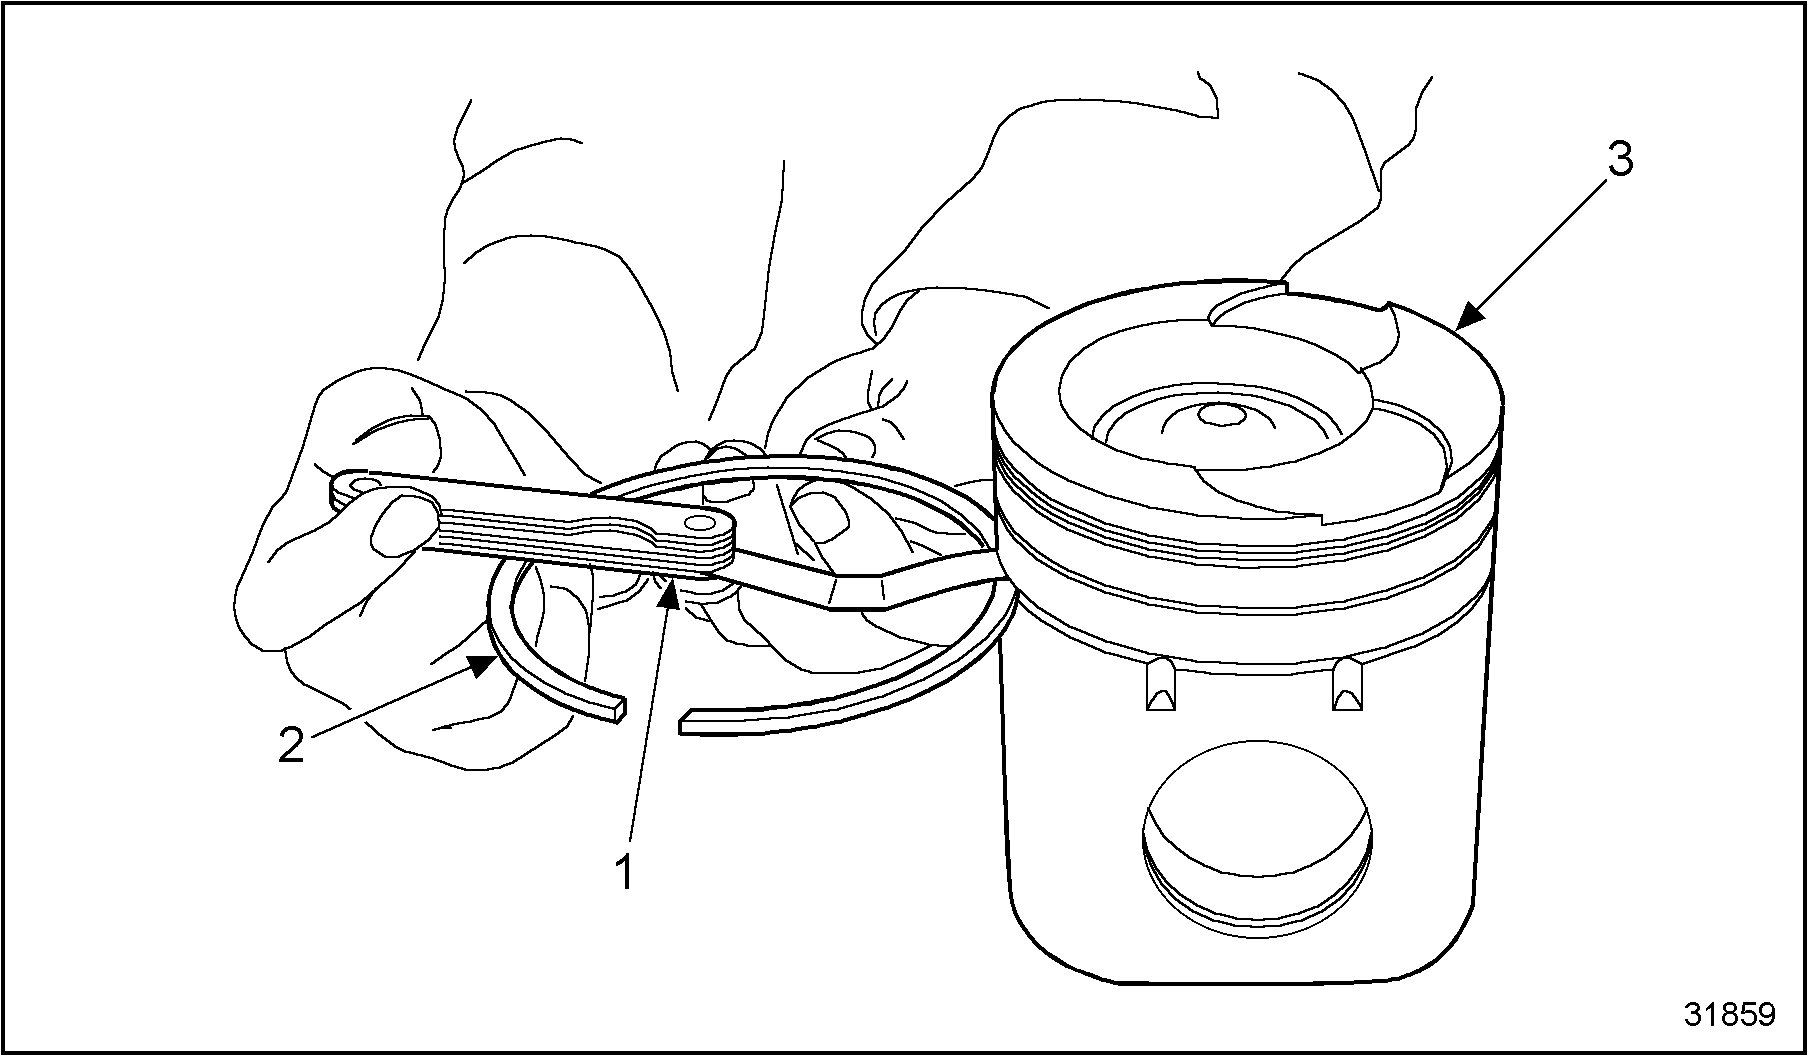
- Using pliers, remove the two (2) piston pin retaining rings.
Note: Mark components with the piston number from which they were removed so they may be installed properly.
- Remove the piston pin from its bore, by hand. Then separate the connecting rod from the piston. See Figure
"Connecting Rod Assembly Removal"
. Refer to "1.18.8 Assembly of Connecting Rod Bearing Inserts and Caps"
for reassembly.

1. Crankcase
3. Wrench
2. Connecting Rod Mounting Bolt (12)
Figure 4. Connecting Rod Assembly Removal
- Remove the piston skirt from the piston crown on the two (2) piece piston assemblies found on the Series 40E, 8.7L.
- Use a piston ring expander tool to remove the piston rings. Remove the top ring first, then the intermediate ring and the oil control ring.
Section 1.17.3.1
Cleaning of Piston and Rod Assembly
Clean the piston and rod assembly as follows:
- Clean the aluminum pistons using a soap and water solution; soak and then clean pistons, using a non-metallic brush.
- All piston ring grooves must be cleaned thoroughly. Ensure the two (2) cast oil holes or oil slots in the oil ring groove are open.
- The following disassembled components may be cleaned using a suitable solvent--piston rings, pins, pin retainers and connecting rods.
Note: Never use a caustic solution or a wire brush for cleaning the aluminum pistons.
- Clean all rod bolt holes and threads thoroughly.
- Clean the oil hole at the top of the rod. Ensure it is not blocked.
Section 1.17.3.2
Inspection
Perform the following steps to inspect the connecting rod, piston, rings and liner.
- Soak the cylinder liners in a soap and water solution and clean thoroughly using a non-metallic brush.

To avoid injury from flying debris when using compressed air, wear adequate eye protection (face shield or safety goggles) and do not exceed 40 psi (276 kPa) air pressure.
- Dry with filtered compressed air.
Section 1.17.3.3
Inspection of Piston
Follow these steps to inspect the pistons.
- Visually inspect the pistons for scuffed or scored skirts and cracked or worn lands. Replace the pistons as required.
- Check top and intermediate compression ring groove widths for wear as follows:
- Install the 2.921 mm (0.1150 in.) gage pins from the piston groove wear gage pin set, into the groove to be measured. See Figure "Piston Ring Location" .
- Measure the piston diameter over gage pins using an outside micrometer. See Figure "Measuring Piston Diameter" .
- If the measurement over the gage pins is NOT within specifications, excessive piston groove wear exists and the piston must be replaced with a new piston.

1. Oil Control Ring
3. Top Ring
2. ntermediate Ring
4. Piston
Figure 5. Piston Ring Location

1. Piston
3. Micrometer
2. Piston Ring Gage
Figure 6. Measuring Piston Diameter
- Check the rectangular oil control ring groove for side clearance as follows. Refer to Specifications
in Section 1.A.
- Using a new ring, place the outer edge of the ring in the oil control ring groove.
- Roll the ring, in its respective groove, entirely around the piston. Make sure the ring is "free" in the groove.
- With a feeler gage check the side clearance of each oil control ring in its respective groove. See Figure "Measuring Piston Diameter" .
- Excessive side clearance indicates ring groove wear and requires piston replacement.
1. Feeler Gage
3. Piston
2. Oil Control Ring
Figure 7. Measuring Piston Diameter
- Check piston to cylinder liner running clearance, as follows:
- Measure and record the piston skirt diameter. With the piston at room temperature, place an outside micrometer 27.43 mm (1.080 in.) below the bottom land of the oil control ring 90 degrees from the pin bore. See Figure "Piston Skirt Diameter Measurement" .
- Measure cylinder liner inside diameter. Record the reading.
- Subtract the piston skirt diameter from the cylinder liner I.D. The resulting dimension is the piston to cylinder liner running clearance.
- If running clearance is not within specifications, replace the piston.

1. Piston
2. Micrometer
Figure 8. Piston Skirt Diameter Measurement
Section 1.17.3.4
Inspection of Piston Ring
Follow these steps to inspect the piston rings.
- Visually inspect new rings for cleanliness.
Note: Faulty rings cannot always be detected by visual inspection. Whenever a piston is removed from a cylinder, it is recommended that piston rings be replaced.
- Prior to installing the rings on the piston, check each ring for proper gap as follows:
- Push the ring down into the cylinder bore making sure the ring is square with the cylinder wall.
- Measure the gap between the ends of each ring with a feeler gage. See Figure "Check Ring Gap" . Discard any new ring which does not meet the specifications.
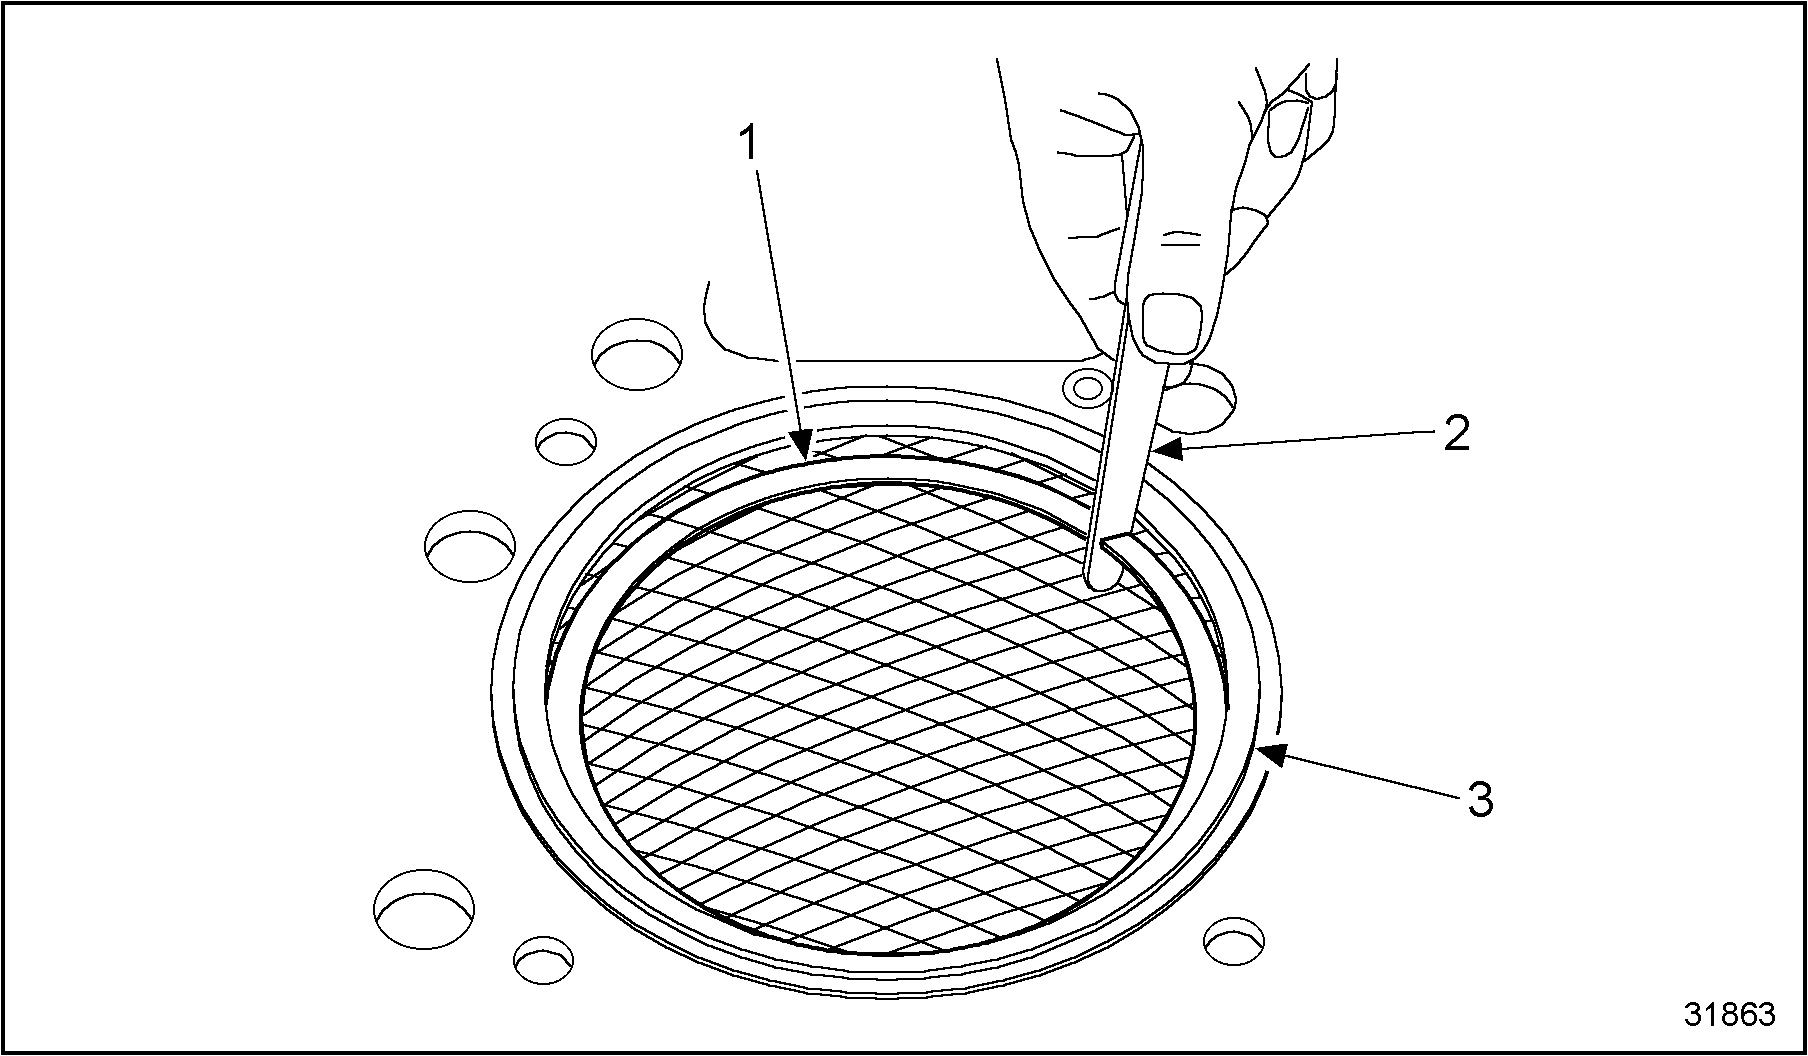
1. Piston Ring To Be Checked
3. Cylinder Sleeve
2. Feeler Gage
Figure 9. Check Ring Gap
| Series 40E Service Manual - 6SE410 |
| Generated on 10-13-2008 |