Section 1.12
Flywheel
The flywheel is attached to the rear of the crankshaft with ten bolts. The bolt holes in the crankshaft and flywheel are evenly spaced. The flywheel is not indexed to the crankshaft, and may be installed in any position. See Figure "Typical Flywheel Assembly" .

|
1.Bolt |
3.Flywheel |
|
2.Ring Gear |
|
Figure 1. Typical Flywheel Assembly
Section 1.12.1
Repair or Replacement of Flywheel
To determine if repair is possible or replacement is necessary, perform the following procedure. See Figure "Repair or Replacement of Flywheel Flowchart" .

Figure 2. Repair or Replacement of Flywheel Flowchart
Section 1.12.2
Removal of Flywheel
Pre-cleaning is not necessary.
Remove the flywheel as follows:
- Remove the transmission assembly. Refer to OEM guidelines.
- Remove the inspection plug in the bottom of the flywheel housing.
- Install the flywheel lock, J 36375. See Figure
"Installation of Flywheel Lock"
.
1.Flywheel
2.Flywheel Housing
Figure 3. Installation of Flywheel Lock
- Thread the center screw of the tool until the tip of the tool rests between two teeth of the flywheel ring gear.
Note: It may be necessary to bar the engine over (using the square hole in the middle of the crankshaft pulley) so that the center screw of the tool is exactly between two teeth. See Figure "Barring Engine Over" .
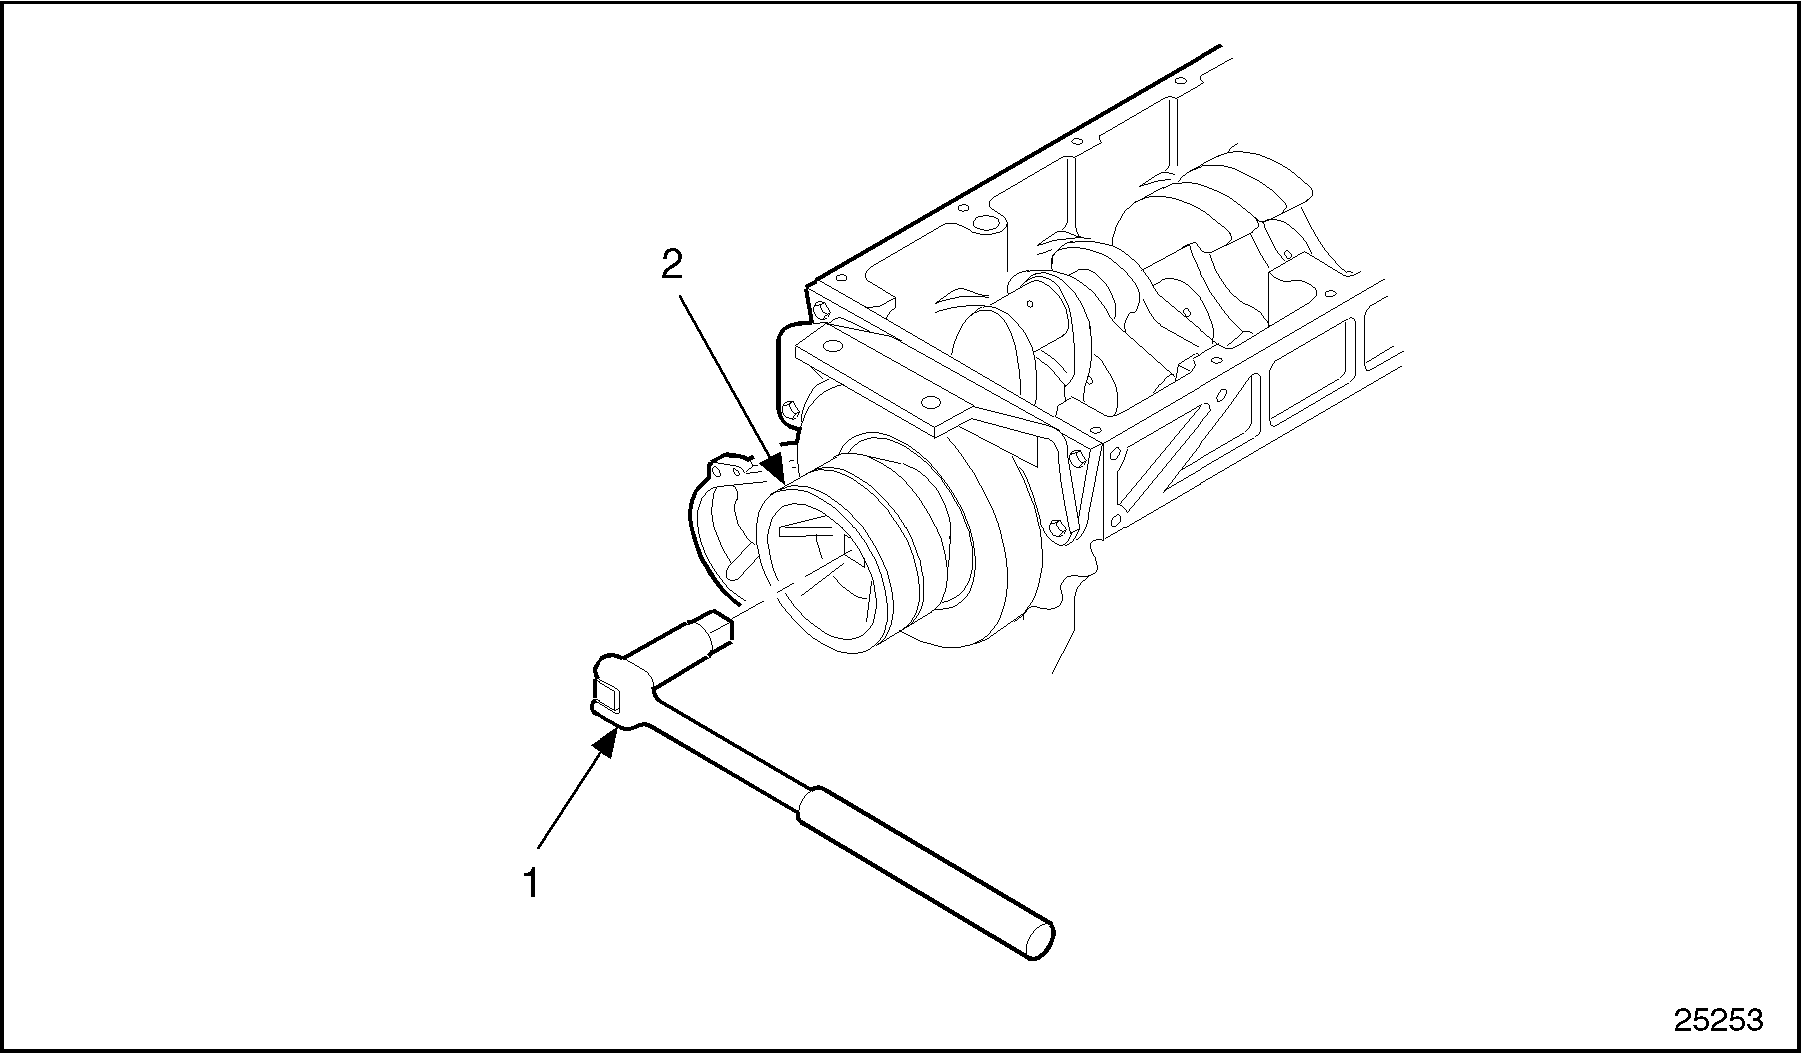
1.Long Handled Breaker
2.Crankshaft Pulley
Figure 4. Barring Engine Over
- Tighten the knurled knob finger-tight.
- Remove 9 of the 10 flywheel attaching bolts, leaving one bolt in the 12 o' clock position.
- Install two flywheel guide studs, J 41595, through the flywheel and into the crankshaft at the 3 and 9 o' clock positions. See Figure
"Flywheel Guide Studs"
.

1.Crankshaft
Figure 5. Flywheel Guide Studs
- Attach the flywheel lifting tool, J 25026 to the flywheel. See Figure "Flywheel Removal" .
- Attach a chain hoist to the lifting tool.
- Loosen, but do not remove, the last flywheel attaching bolt.
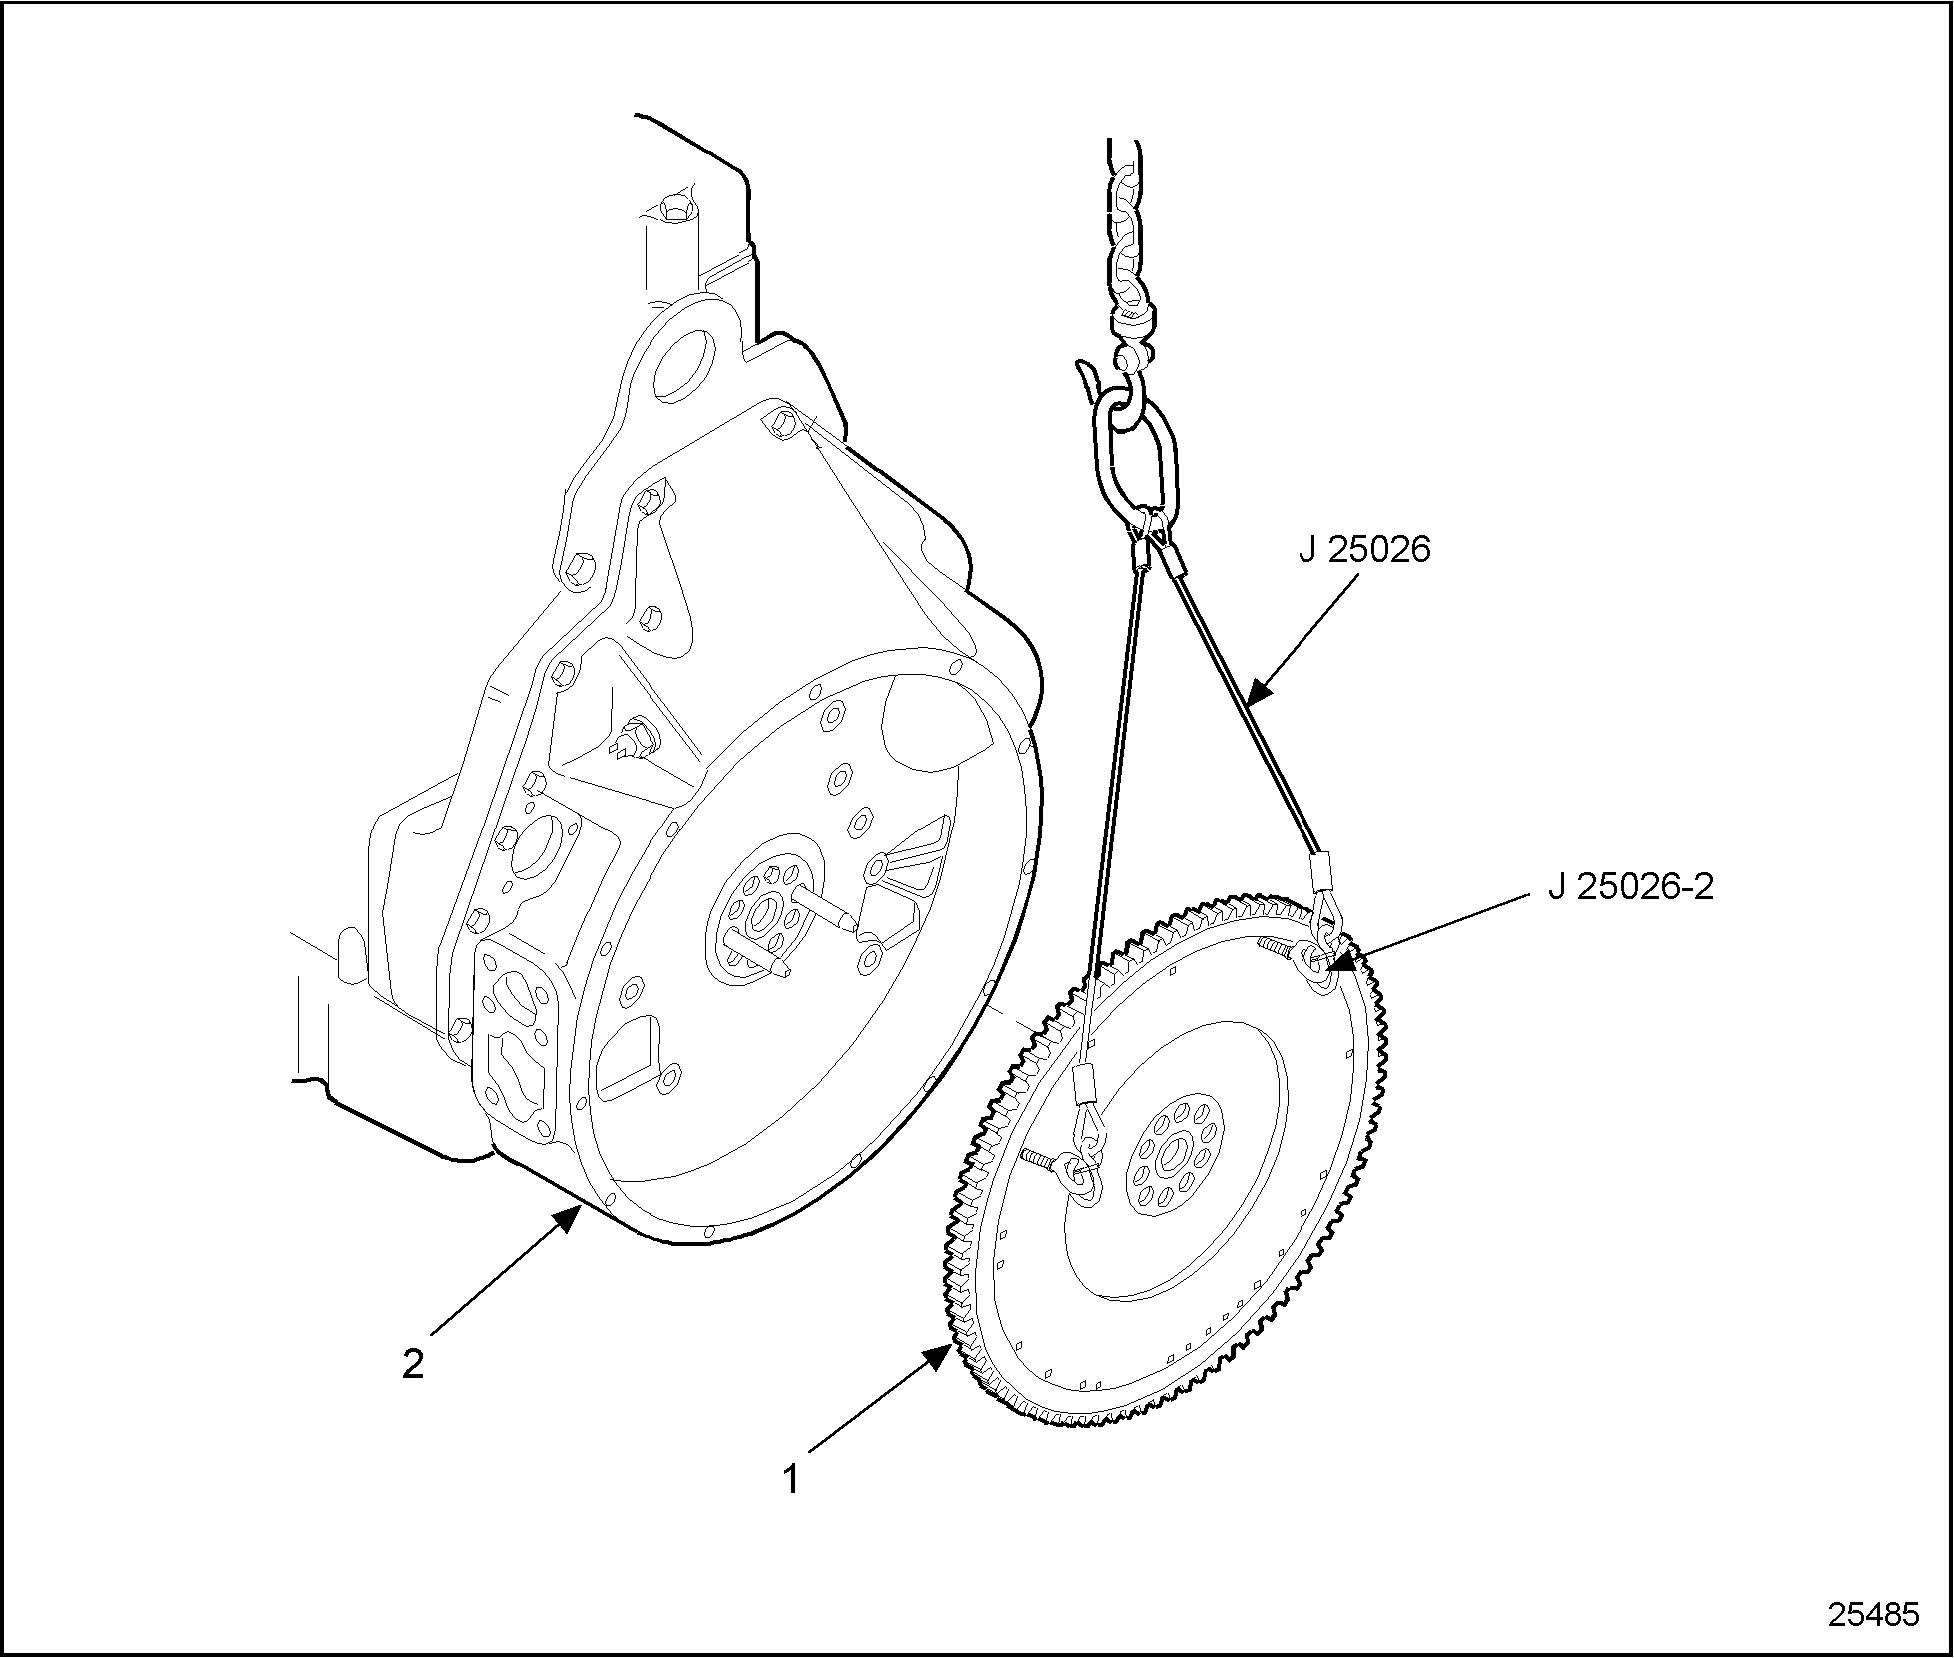
1.Flywheel
2.Flywheel Housing
Figure 6. Flywheel Removal

To avoid injury from a falling flywheel when removing the last bolt, hold the flywheel against the crankshaft by hand to prevent it from slipping off the crankshaft. The flywheel is not doweled to the crankshaft.
- Remove the flywheel lock.
- Remove the final flywheel attaching bolt.
- Remove the flywheel.
Section 1.12.2.1
Inspection of Flywheel
Inspect the flywheel as follows:
- Inspect the clutch contact base of the flywheel.
- Check the clutch contact base for scoring, wear, or cracks.
- If the clutch contact face is scored or worn, reface the flywheel.
- If the clutch contact face is cracked, replace the flywheel.
- Inspect flywheel flatness.
- Check the flatness of the clutch face of the flywheel with a straight edge.
- The flywheel surface must be flat within 0.05 mm (.0022 in.), when measured across the face of the 14 in. clutch surface.
- If the measurement exceeds this specification, replace the flywheel.
- Inspect the ring gear.
- Check ring gear for excessively worn or damaged gear teeth.
- If damaged gear teeth are detected, replace the ring gear. Refer to "1.14.2 Removal of Ring Gear" .
- Inspect the crankshaft and flywheel contact surface.
- Check the butt end of the crankshaft and flywheel contact surface for fretting, brinelling, or burrs. See Figure "Crankshaft and Flywheel Mating Surfaces" .
- Lightly stone the contact surface to remove any fretting, brinelling, or burrs.

1.Mating Surface
Figure 7. Crankshaft and Flywheel Mating Surfaces
Section 1.12.3
Installation of Flywheel
Install the flywheel as follows:
- Install two flywheel guide studs, J 41595, into two of the tapped holes in the crankshaft at the 3 and 9 o' clock positions.
- Attach the flywheel lifting tool, J 25026-2, and using a chain hoist, position the flywheel in the flywheel housing. Align the flywheel bolt holes with the crankshaft bolt holes.
- Install two bolts 180 ° apart.
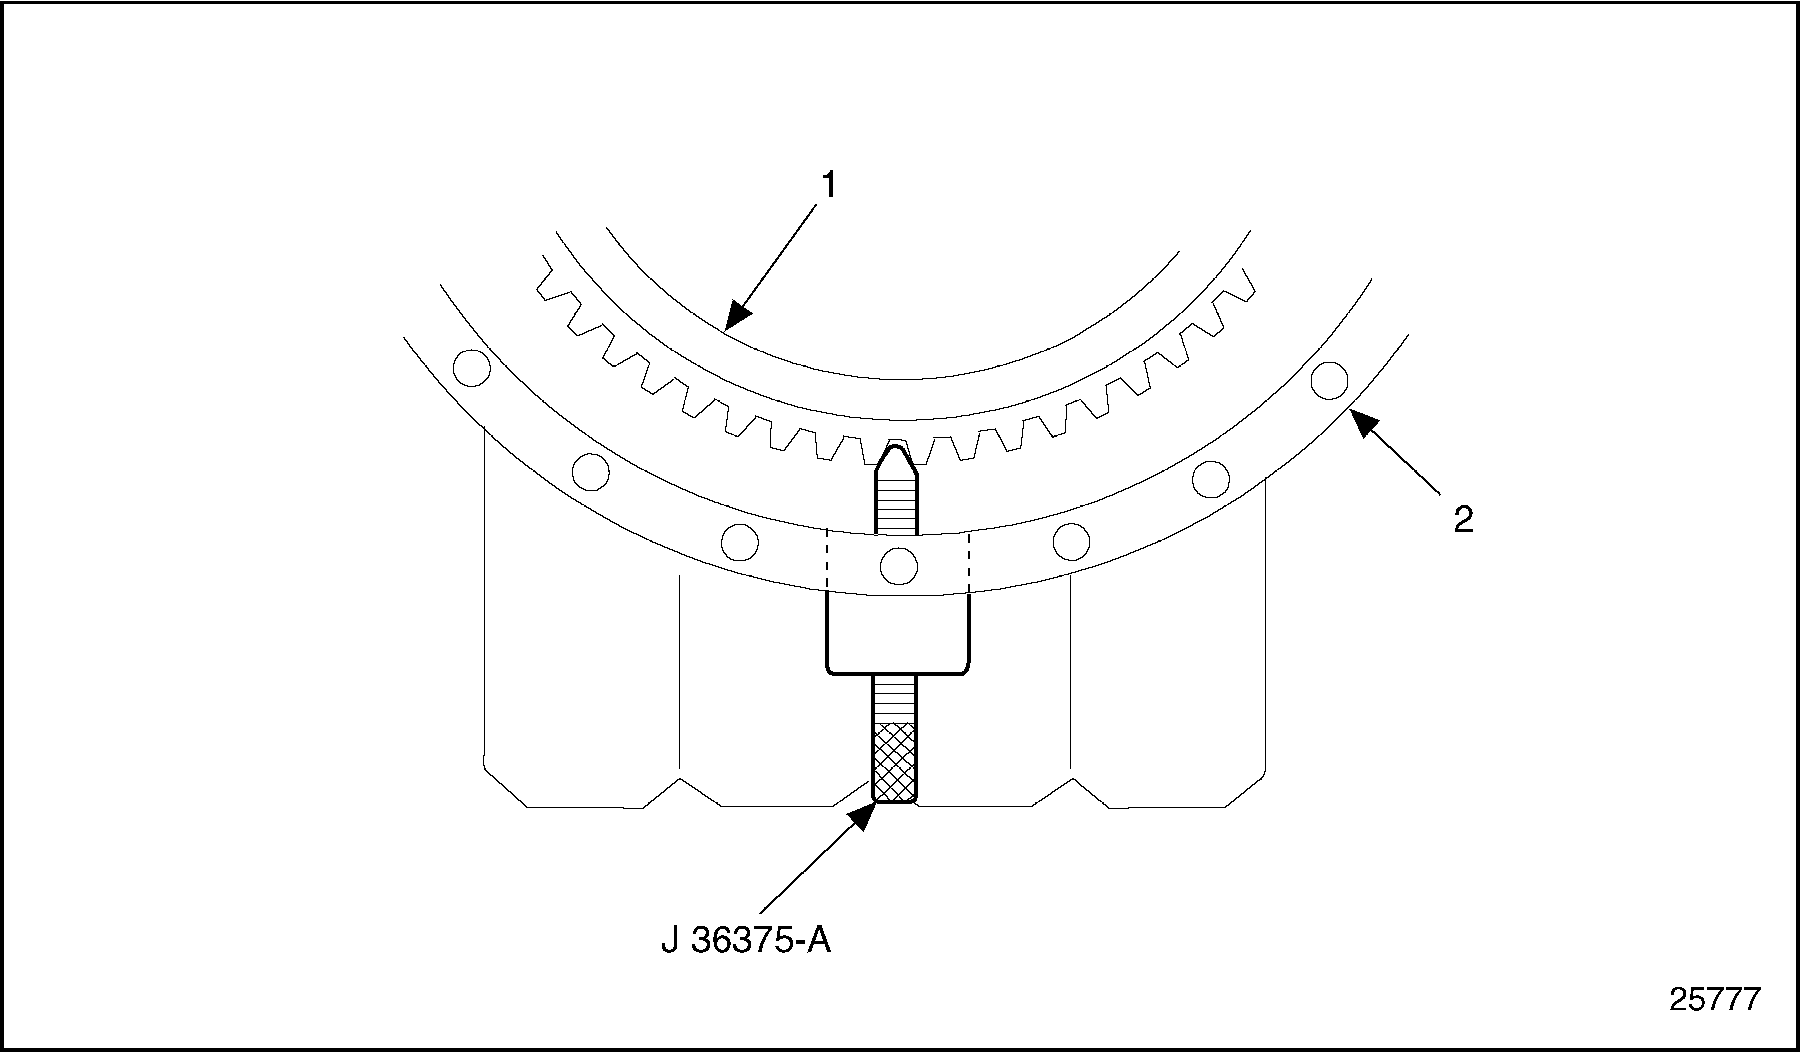
- Install the flywheel lock, J 36375-A. See Figure
"Flywheel Lock Installation"
.
1.Flywheel
2.Flywheel Housing
Figure 8. Flywheel Lock Installation
- Remove the flywheel lifting tool and guide studs.
- Install the bolts, and torque them to 200-220 N · m (148-162 lb · ft).
- Turn the bolts an additional 90-110 ° . See Figure
"Torque Turn Limits"
.
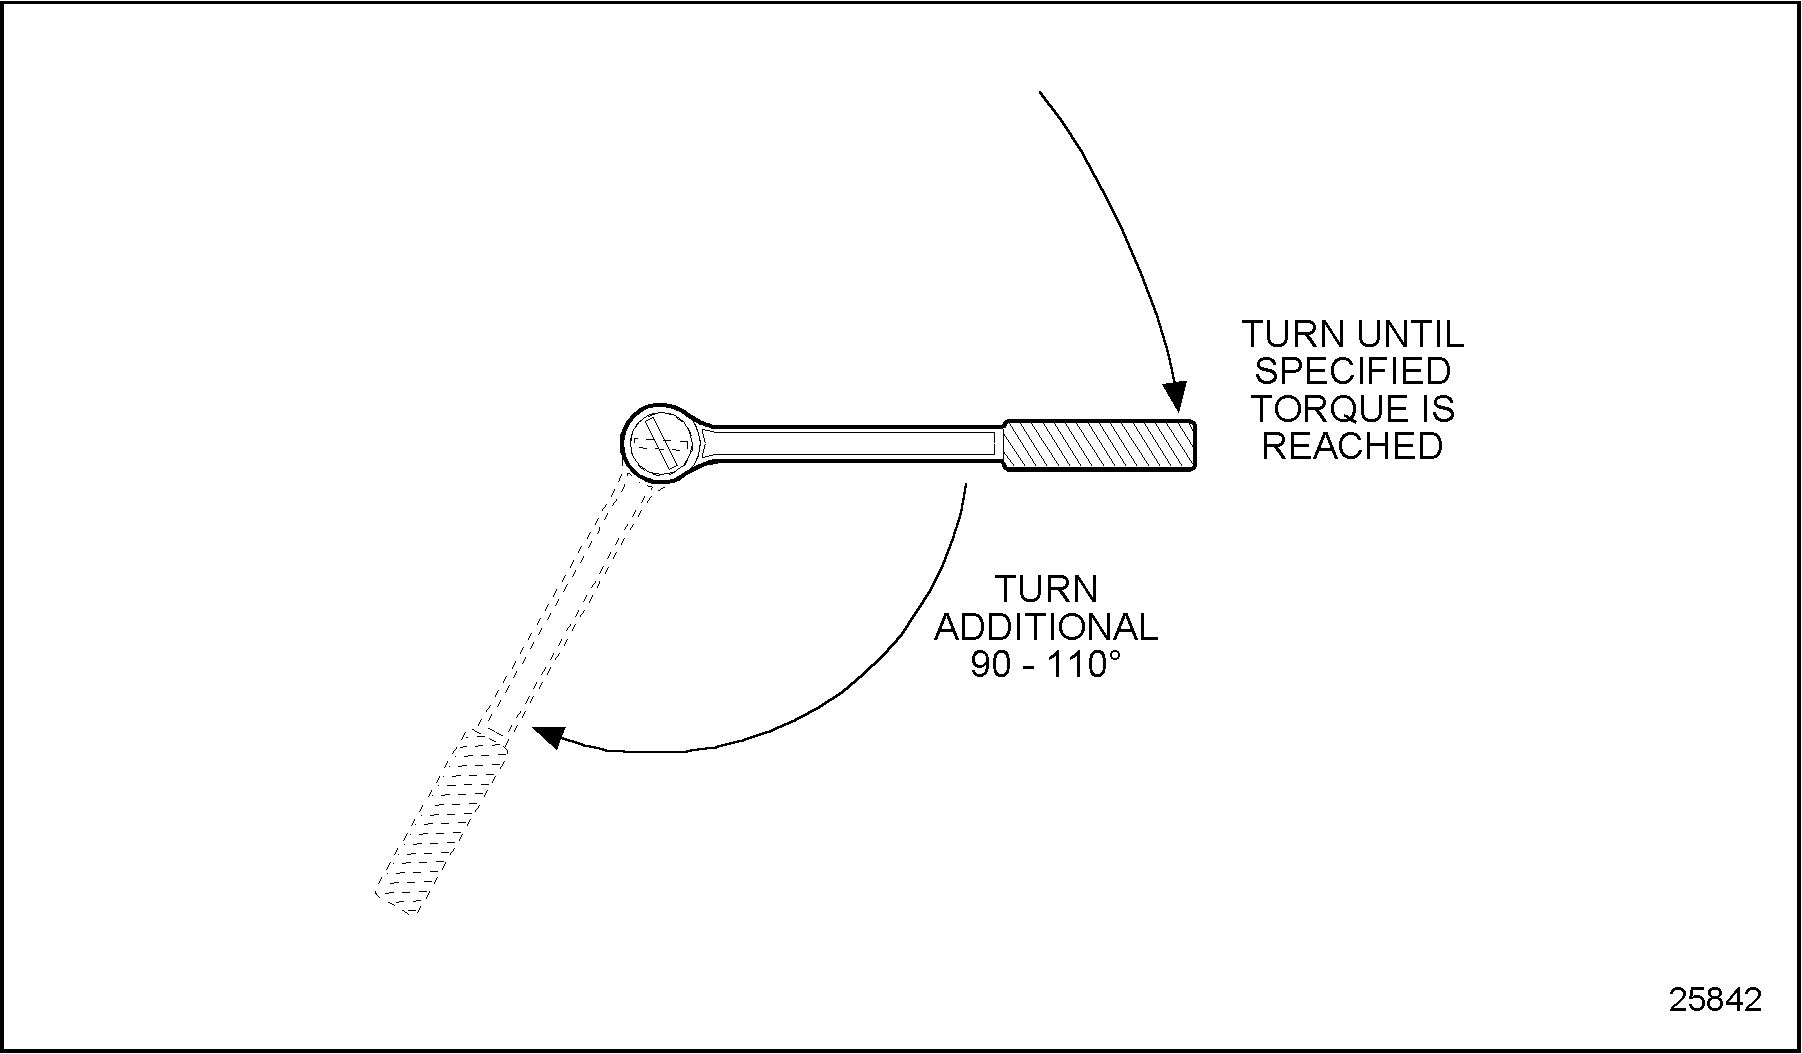
Figure 9. Torque Turn Limits
- Remove the flywheel lock tool, J 36375.
- Install the pipe plug, and tighten to 61-75 N · m (45-55 lb · ft) torque.
- Mount a dial indicator, J 7872, with a magnetic base to the flywheel housing.
- Check the flywheel run-out at the clutch contact face. See Figure
"Measuring Flywheel Run-out"
.

1.Flywheel Housing
2.Flywheel
Figure 10. Measuring Flywheel Run-out
- The maximum allowable run-out is 0.08 mm (.003 in.) total indicator reading.
- If the run-out exceeds allowable limits, replace the flywheel.
| Series 55 Service Manual - 6SE55 |
| Generated on 10-13-2008 |