Section 1.22
Mounting Engine On Stand
Perform the following steps before installing engine to mounting stand:
- Remove oil pan drain plug and plug gasket. Drain all engine oil and discard gasket.
- Reinstall oil pan drain plug together with new plug gasket.
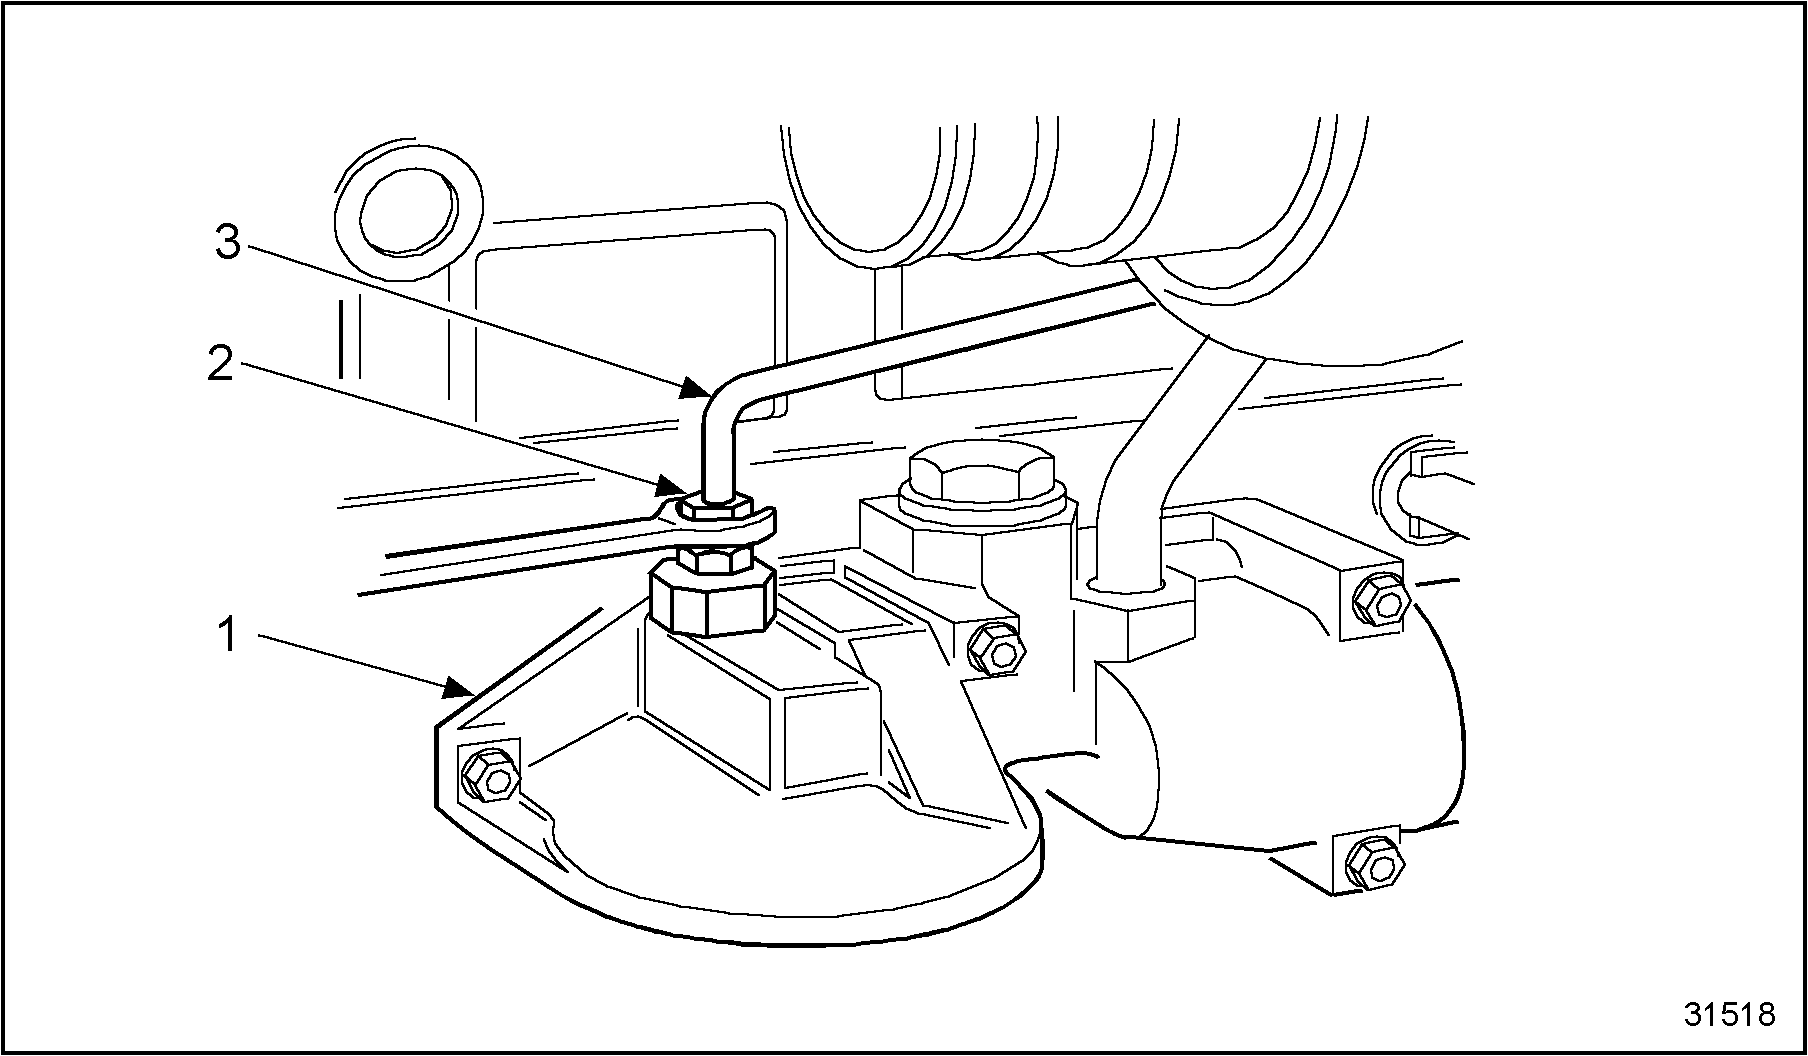
- Using an open end wrench, loosen oil feed supply tube nut located on top of oil filter header. Remove and discard tube nut liner. See Figure
"Drain Oil"
.

1. Oil Filter Header
3. Oil Feed Supply Tube
2. Oil Feed Supply Tube Nut
Figure 1. Drain Oil
Note: Discard oil according to EPA standards.
- Remove two (2) mounting bolts securing oil feed supply tube to top of turbocharger housing. Remove oil feed supply tube and tube flange gasket. Discard flange gasket.
- Remove turbocharger oil drain tube as follows. See Figure
"Turbocharger Assembly"
.

1. Turbocharger Assembly
3. Oil Feed Supply Tube
2. Mounting Bolts
Figure 2. Turbocharger Assembly
- Remove one bolt securing turbocharger oil drain tube retaining plate to crankcase.
- Remove two (2) capscrews securing turbocharger oil drain tube to bottom of turbocharger housing.
- Remove turbocharger oil drain tube retaining plate together with turbocharger oil drain tube, tube flange, two tube O-rings and tube flange gasket from bottom of turbocharger assembly.
- Discard both drain tube O-rings (one on each end of drain tube) and flange gasket. See Figure "Turbocharger Oil Drain Tube" .

1. Oil Drain Tube Mounting Bolts (2)
4. Turbo Oil Drain Tube
2. Turbo Oil Drain Tube Flange Gasket
5. Turbo Oil Drain Tube Retaining Plate
3. Turbocharger Assembly
6. Oil Drain Tube Mounting Bolt
Figure 3. Turbocharger Oil Drain Tube
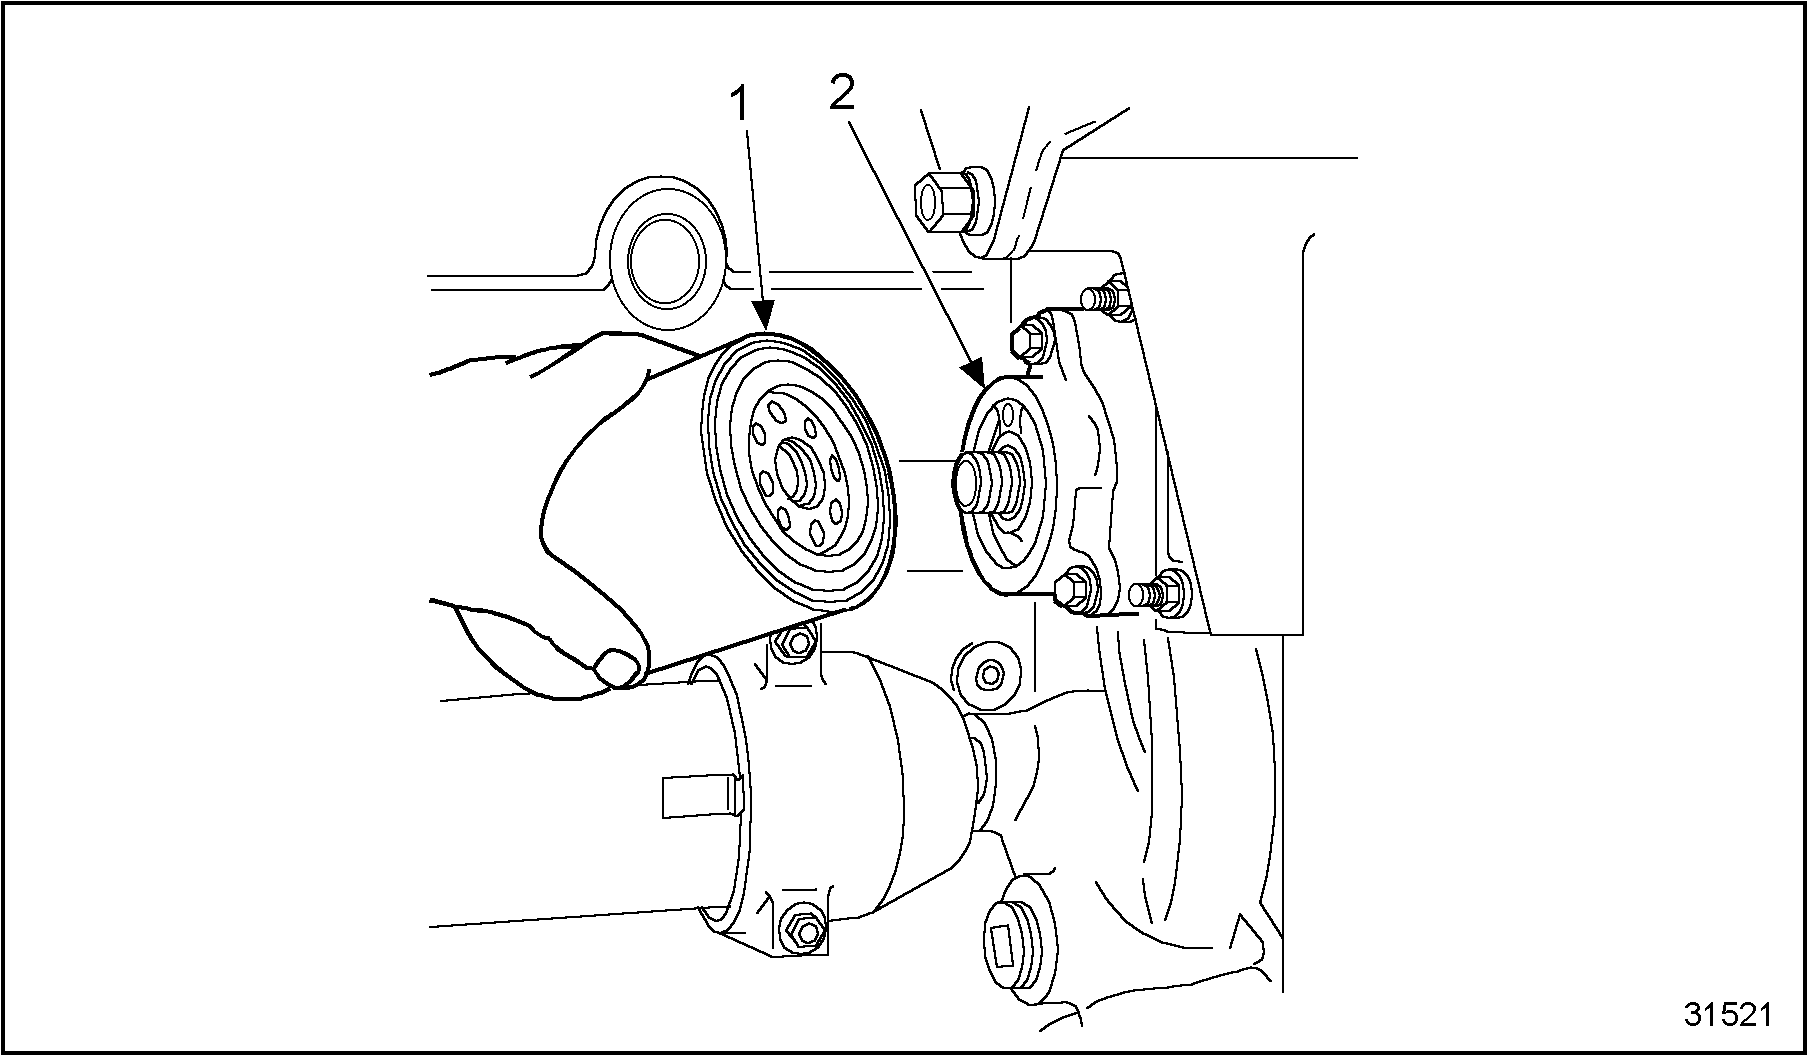
- Remove oil filter from oil cooler filter header. Discard oil filter. See Figure
"Remove Oil Cooler Filter"
.

1. Oil Cooler Filter
2. Oil Filter Header
Figure 4. Remove Oil Cooler Filter
- Remove coolant filter from header. Discard old coolant filter. See Figure
"Remove Coolant Filter"
.

1. Coolant Filter
2. Coolant Filter Header
Figure 5. Remove Coolant Filter
- Remove one (1) bolt and retainer plate securing water coolant supply tube from crankcase.
Note: Remove oil cooler and water coolant supply tube as an assembly.
- Remove oil cooler assembly as follows. See Figure
"Remove Water Coolant Supply Tube"
.

1. Retainer Plate Mounting Bolt
3. Water Coolant Supply Tube
2. Retaining Plate
Figure 6. Remove Water Coolant Supply Tube
- Remove bolts securing oil cooler filter header and front header to crankcase. See Figure "Oil Cooler Assembly" .

1. Mounting Bolt
3. Oil Cooler Bundle
2. Oil Cooler Filter Header
Figure 7. Oil Cooler Assembly
- Remove oil cooler and water coolant supply tube as an assembly from the crankcase. See Figure
"Oil Cooler Assembly"
.

1. Oil Pressure Regulating Valve
3. Oil Cooler Assembly
2. Water Coolant Supply Tube
Figure 8. Oil Cooler Assembly
- Remove oil pressure regulating valve assembly from the crankcase.
Note: The oil pressure regulating valve should be tagged upon removal to ensure identification. Do not mix oil pressure regulator valve with oil pressure relief valve (found in front cover).
- Cap all openings to prevent debris from entering.
Note: Whenever mounting an engine to a repair stand, refer to the instructions included with the mounting stand and its corresponding adaptor plates for specific directions on their safe use. Use only metric m-10 / grade 8 bolts when mounting the engine to an engine stand.
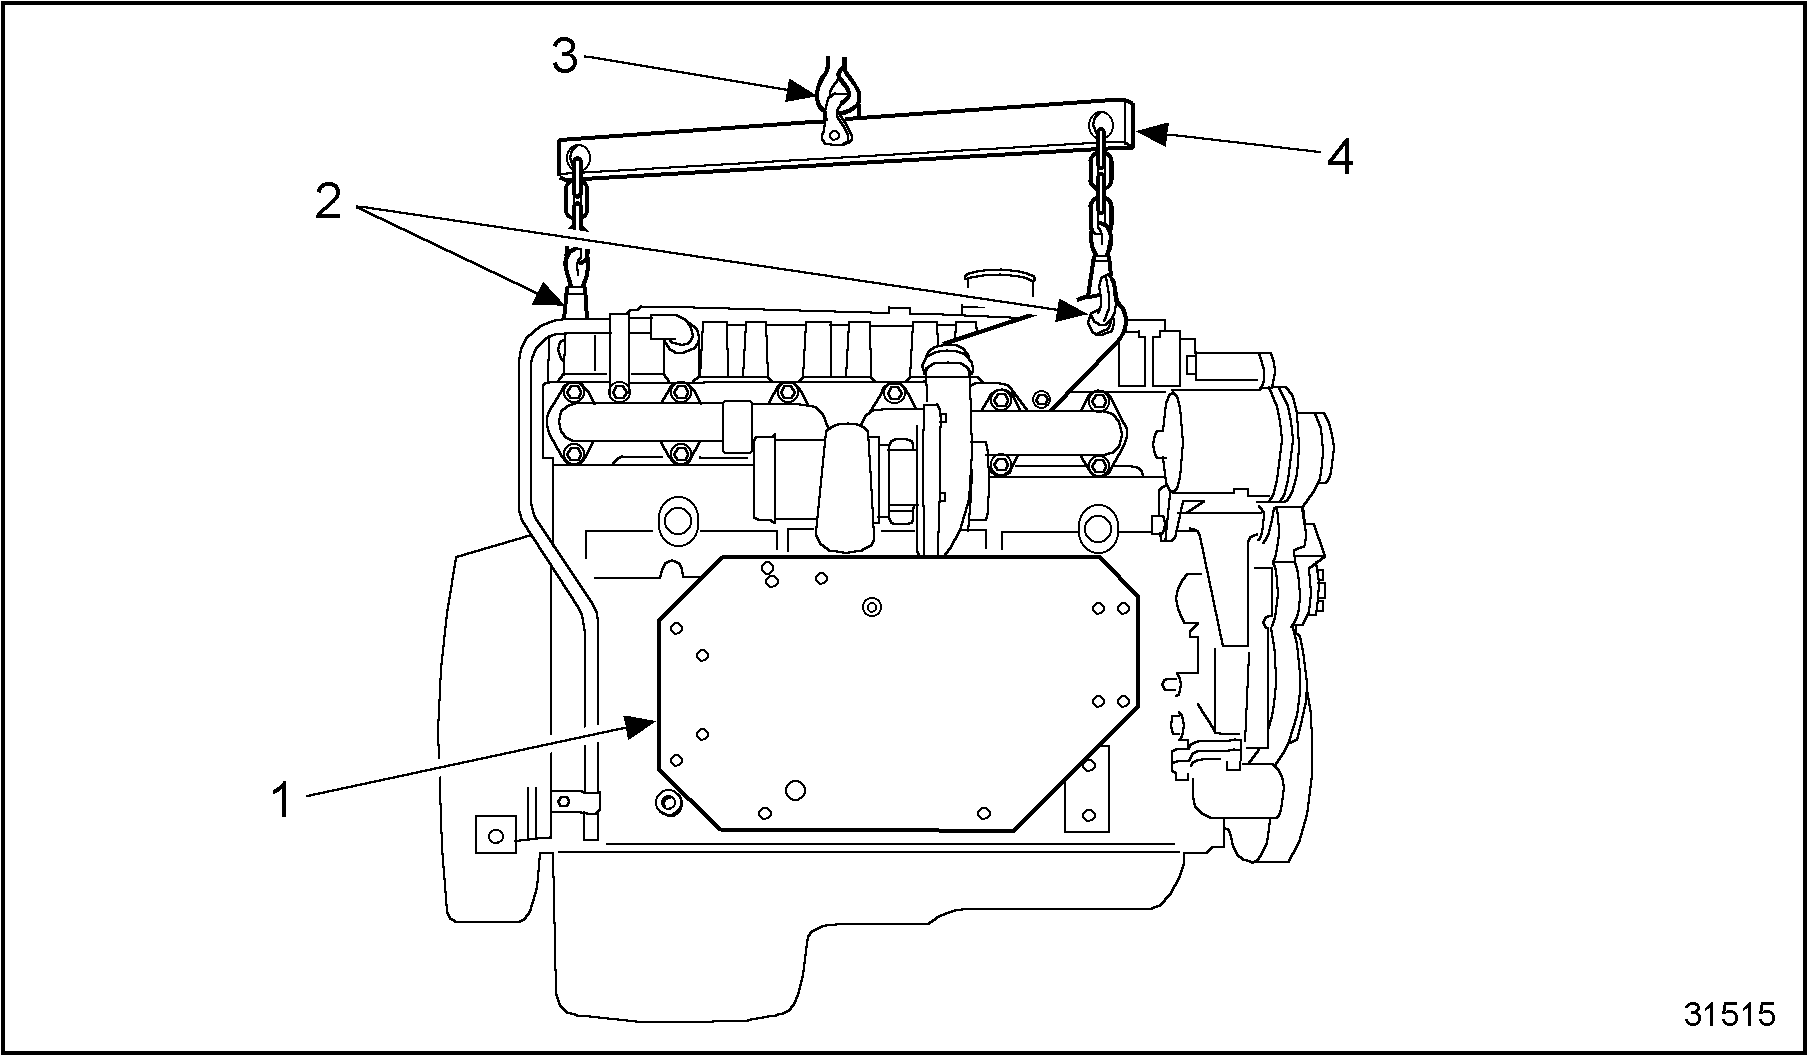
- Install adaptor plate as directed. Refer to instructions included with the engine stand and secure adaptor plate to the side of the engine. See Figure
"Adaptor Plate Installation"
.
Note: Adaptor plate must be mounted to the engine first, before installing the engine stand. Locating guide pins (made locally) are recommended to assist in aligning and holding the adaptor plate.

1. Adaptor Plate
3. Hoist Hook
2. Lifting Eye (2)
4. Lifting Bar
Figure 9. Adaptor Plate Installation
- Attach engine stand to adaptor plate. See Figure
"Adaptor Plate Mount"
.

1. Engine Stand
2. Adaptor Plate
Figure 10. Adaptor Plate Mount
| Series 40E Service Manual - 6SE410 |
| Generated on 10-13-2008 |