Section 1.12
Crankshaft Vibration Damper
A viscous type vibration damper is mounted on the front end of the crankshaft to reduce torsional vibrations to a safe value. See Figure "Viscous Vibration Damper Mounting with Crankshaft Pulley or Crankshaft Pulley and Hub Assembly with Spindle" .
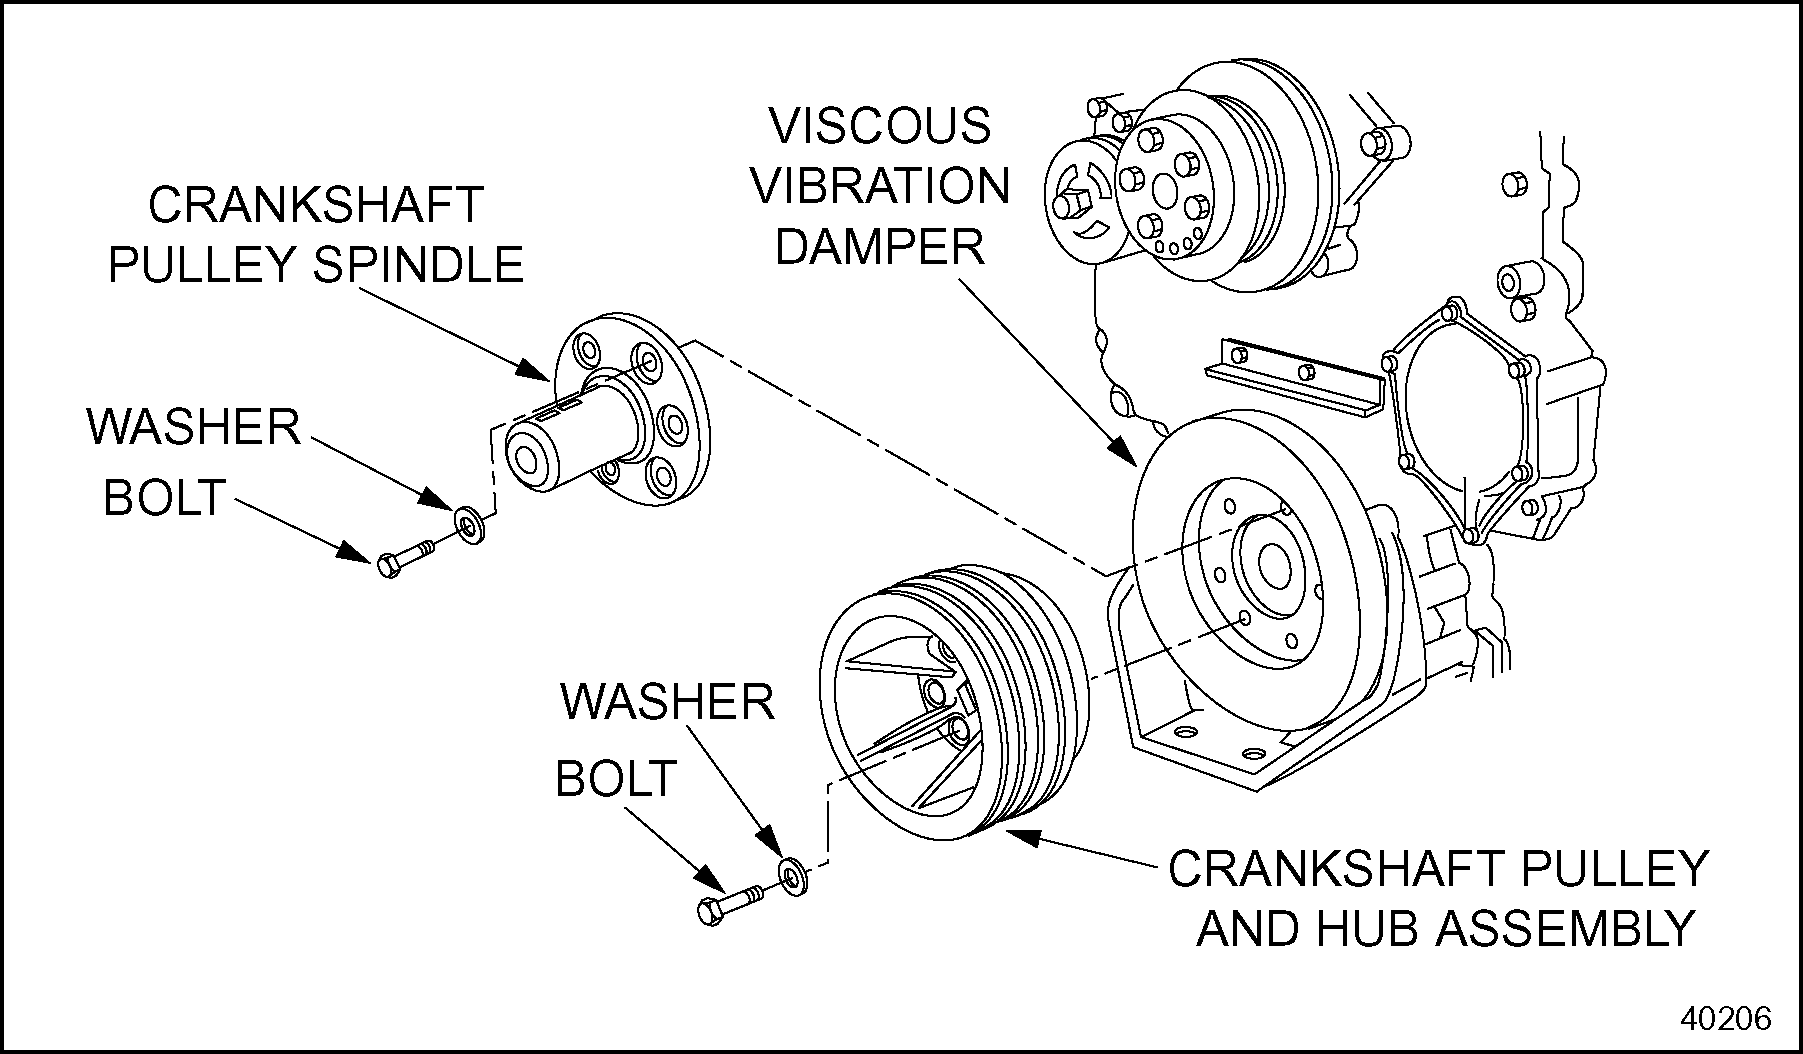
Figure 1. Viscous Vibration Damper Mounting with Crankshaft Pulley or Crankshaft Pulley and Hub Assembly with Spindle
The viscous damper assembly consists of a sealed outer shell, an internal flywheel and a quantity of highly viscous fluid. See Figure "Viscous Vibration Damper Detail" .
A vibration damper safety shield is recommended in industrial and marine applications in which the engine operates without a hood or other protective covering in an open or unprotected area.
A properly designed and installed safety shield protects the damper from damage, prevents direct physical contact with the damper during engine operation, and significantly reduces the potential for damper-related personal injury.
Detroit Diesel Corporation does not manufacture, sell or install vibration damper safety shields due to the wide variety of installations in which Detroit Diesel engines are applied. Space restrictions in these numerous applications make it necessary to design an appropriate type of shield for each installation.
The responsibility for designing and installing properly shaped and constructed safety shields, therefore, rests with the OEM (Original Equipment Manufacturer), distributor, or other fabricator designing or manufacturing products in which they apply to Detroit Diesel engines.

|
1. Crankshaft |
3. Damper Shell |
|
2. Viscous |
4. Internal Flywheel |
Figure 2. Viscous Vibration Damper Detail
During operation, the outer shell, which is firmly attached to the crankshaft, turns at the same speed as the crankshaft, its motion being transferred to the flywheel through the fluid within the shell. Since "fluid-drive" is more or less inefficient with frequent speed changes, considerable flywheel slippage will take place as the power impulses are transmitted through the crankshaft. In this type of operation, the slippage is desirable since the acceleration and deceleration of the flywheel in the damper lessens the vibration amplitude, reducing its effects to a level harmless to the engine.
Section 1.12.1
Repair or Replacement of Crankshaft Vibration Damper
To determine if repair is possible or replacement is necessary, perform the following procedure. See Figure "Flowchart for Repair or Replacement of Crankshaft Damper" .

Figure 3. Flowchart for Repair or Replacement of Crankshaft Damper
Section 1.12.2
Cleaning and Removal of Crankshaft Vibration Damper
Precleaning is not necessary.
|
PERSONAL INJURY |
|
To avoid injury from the projection of tools or other objects that may fall on or behind the vibration damper of an engine, always check and remove these items before starting the engine. |
Remove crankshaft vibration damper as follows:
- Remove the drive belts from the crankshaft pulley.
- Remove the inspection plug in the bottom of the flywheel housing and install the flywheel lock, J 36375–A
. See Figure
"Flywheel Lock"
.

Figure 4. Flywheel Lock
- Thread the center screw of the tool in until the tip of the tool rests between two teeth of the flywheel ring gear.
Note: It may be necessary to bar the engine over (using the square hole in the middle of the crankshaft pulley or the center bolt when the pulley and hub assembly with spindle is used) so that the tool center screw is exactly between two teeth.
- Finger-tighten the knurled knob.
- On keel-cooled marine engines, remove the charge air cooler tank. Refer to "4.4.2 Cleaning and Removal of Pressure Control Cap" .
- Remove the isolated pulley from the spindle by removing the large center bolt (if equipped with this pulley style). Refer to "1.13.2 Removal and Cleaning Crankshaft Pulley" .
- Remove two of the six crankshaft pulley or crankshaft pulley spindle-to-crankshaft special attaching bolts and hardened washers that are 180 ° apart. Discard the bolts. These bolts are not reusable.
- Install two guide studs, J 36235
, into the holes where the bolts were removed.
NOTICE:
Use care when removing the crankshaft pulley as the vibration damper may come off. If the damper is allowed to fall, internal damage to the damper will result.
- Remove the remaining four special crankshaft pulley bolts and hardened washers. Discard the bolts. These bolts are not reusable.
NOTICE:
Do not pound with a hammer or pry with other tools to remove the viscous damper from the crankshaft, since the outer shell may be dented and cause the flywheel to turn at the same speed as the outer shell. This renders the damper ineffective. The damper CANNOT be repaired.
- Remove the vibration damper by sliding it off the guide studs.
- Remove the flywheel lock and guide studs.
Section 1.12.2.1
Inspection of the Vibration Damper
Inspect the vibration damper as follows:
NOTICE: |
|
Dents may render the damper ineffective. |
- Inspect the outer casing of the damper for damage.
- Check outer casing for dents, cracks, nicks, fluid leaks or bulges.
- If any dents or cracks are detected, replace with new damper.
- Bulges or splits indicate that the damper fluid has deteriorated. If any are detected, replace with new damper.
- Inspect the damper inner contact surfaces and the crankshaft end for damage. See Figure
"Damper and Crankshaft Contact Surfaces"
- Check for galling or burrs.
- Slight scratches or burrs may be removed with an emery cloth.
- If deep scratches are detected, replace with new damper.
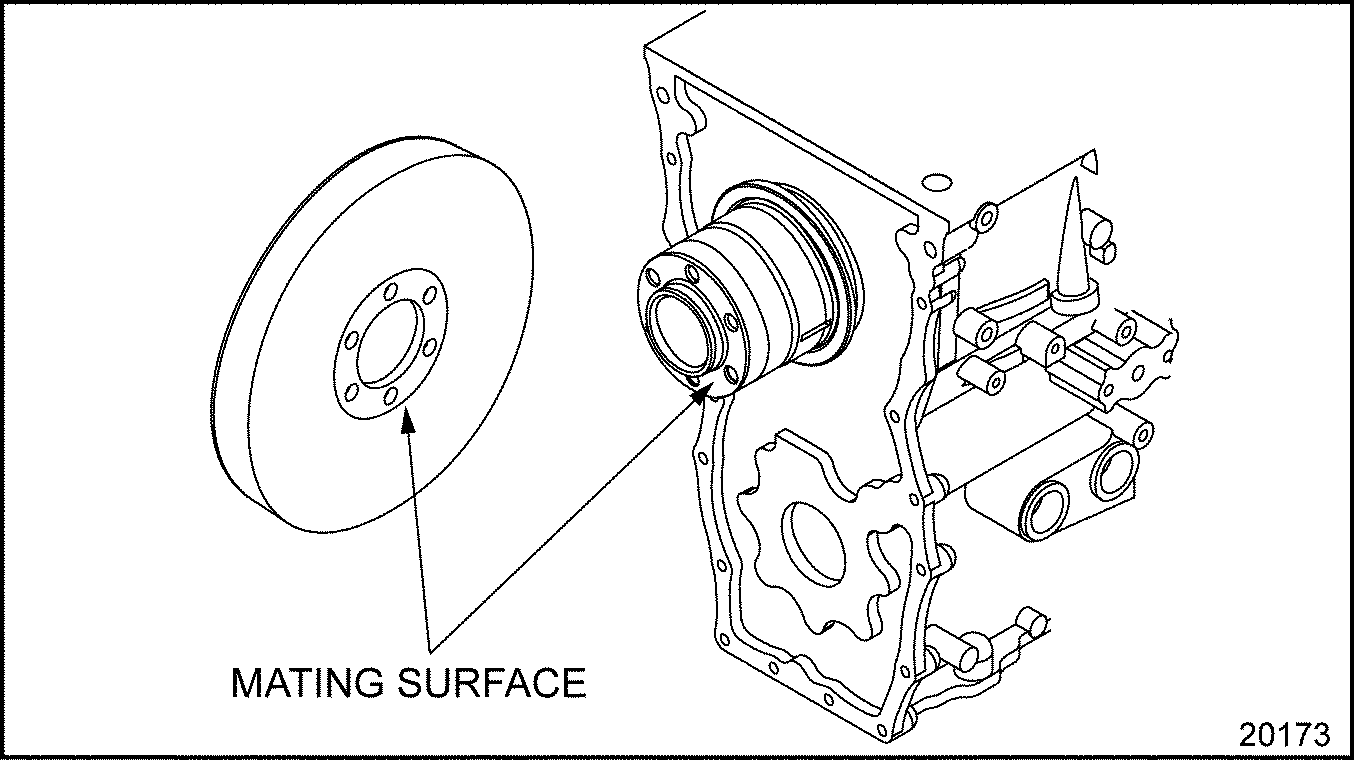
Figure 5. Damper and Crankshaft Contact Surfaces
- Regardless of its condition, a viscous type damper must be replaced at normal engine overhaul or whenever the engine has experienced crankshaft breakage.
- If the vibration damper has been damaged, inspect the crankshaft. Refer to "1.7 Crankshaft"
. Crankshaft damage may have resulted.
NOTICE:
A loose engine mount could lead to damage of the vibration damper by allowing the engine to move slightly during operation.
- Inspect the engine mounts to be sure they are not loose, cracked or deteriorated.
Section 1.12.3
Installation of Crankshaft Vibration Damper
Install the crankshaft vibration damper as follows:
- Install the flywheel lock, J 36375–A
, to the inspection plug hole in the bottom of the flywheel housing. See Figure
"Flywheel Lock"
.
Note: It may necessary to bar the engine over (using barring Tool J 36237) so that the tool center screw is exactly between two teeth.
- Thread the center screw of the tool in until the tip of the tool rests between two teeth of the flywheel ring gear. Finger-tighten the knurled knob.
- Install two guide studs, J 36235 , to two of the holes in the crankshaft pulley 180 ° apart. A light coating of an anti-seize compound should be applied to the pilot diameter (not the face of the crankshaft) to reduce future removal difficulty.
- Install the vibration damper to the end of the crankshaft. The six holes in the damper are equally spaced, and the damper may be installed in any position. The part No. on the face of the damper should face out, away from the engine.
- Install the crankshaft pulley or crankshaft pulley spindle to the crankshaft. The crankshaft pulley or crankshaft pulley spindle may be installed in any position. Refer to "1.13.3 Installation of Crankshaft Pulley"
.
NOTICE:
Crankshaft pulley and spindle mounting bolts are considered single-use items and must not be used. Always use new bolts when mounting the crankshaft pully or spindle. Reusing bolts may result in excessive bolt stretch during installation, leading to loss of bolt torque and loosening during engine operation, which may cause severe engine damage.
- Install four new special bolts, with hardened washers installed, through the pulley or crankshaft pulley spindle and damper and into the crankshaft. Finger-tighten the bolts.
- Remove the two guide studs.
- Install the remaining two new special bolts with hardened washers installed.
- Torque the six bolts to 182-210 N·m (134-155 lb·ft). Proceed in a clockwise direction until all bolts are torqued.
- Install crankshaft pulley and hub assembly (if equipped with this pulley style). Refer to "1.13.3 Installation of Crankshaft Pulley" .
- Remove the flywheel lock tool.
- Install the pipe plug to the inspection hole in the flywheel housing.
- Install the drive belts to the crankshaft pulley. Adjust the belt tensions to the specifications. Refer to "13.5.7 Drive Belts" .
- Install any other components that were removed for this operation.
- Refer to "11.8 Engine Run-in Instructions" for verification of proper crankshaft vibration damper installation.
| Series 50 Service Manual - 6SE50 |
| Generated on 10-13-2008 |