Section 15.2
Remote Mount Ignition Coils
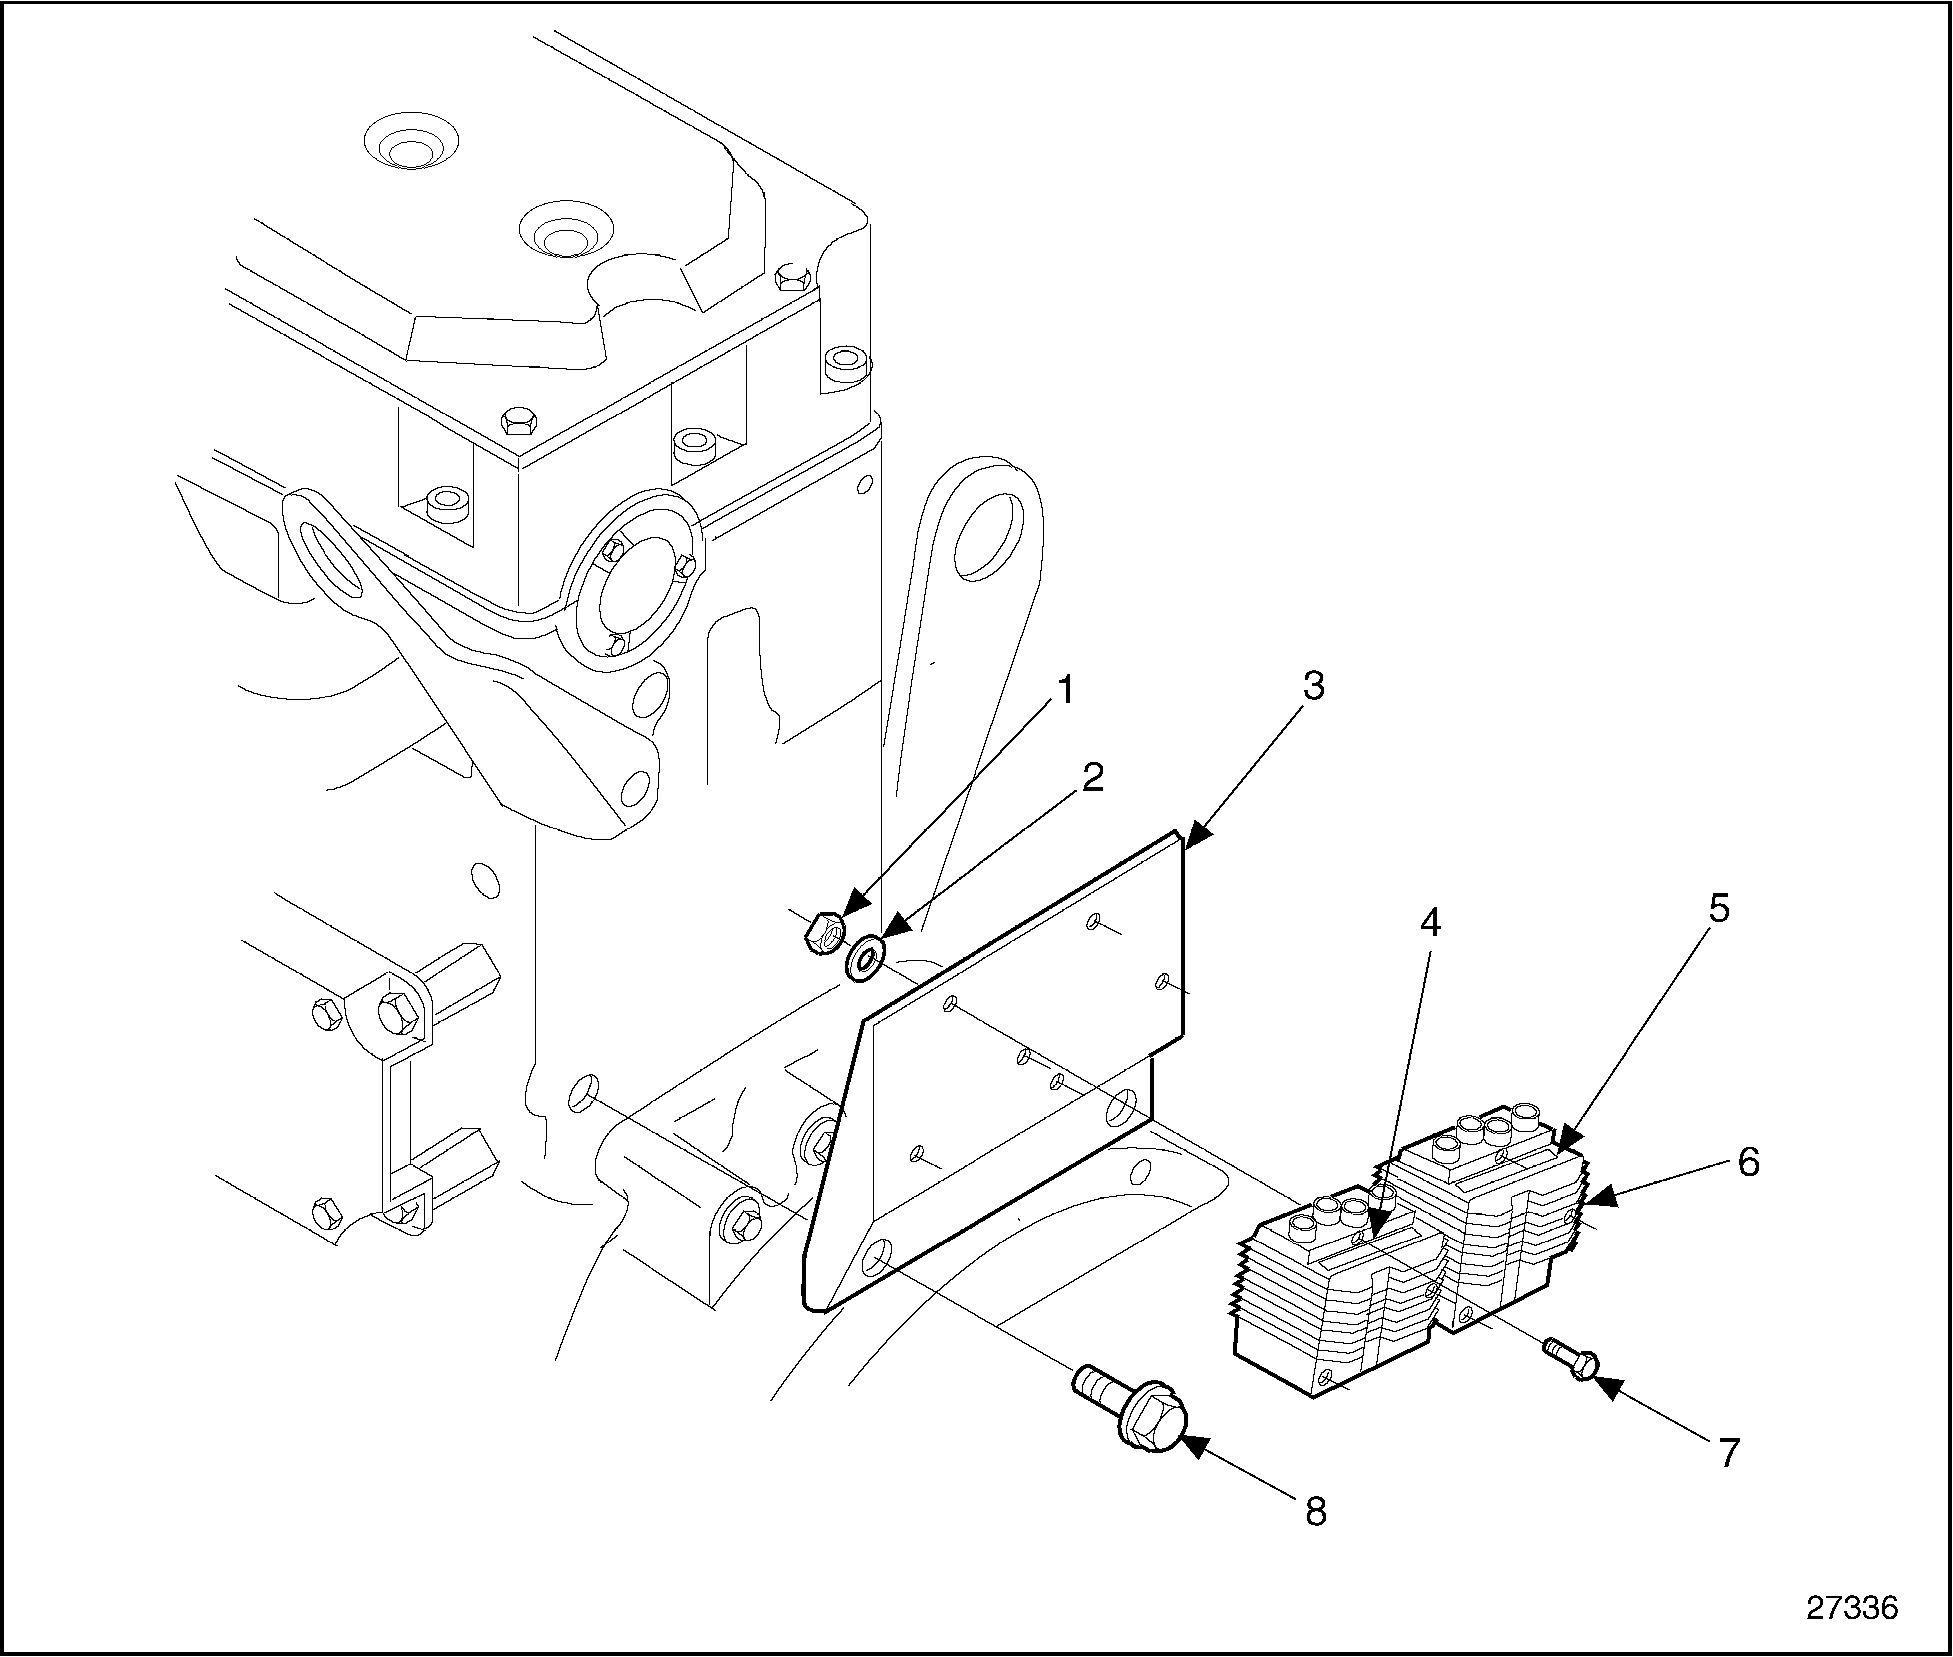
Series 50G engines produced prior to July 1996 used remote mount ignition coils. This system consists of a coil bracket, two coil packs, an ignition wire harness, an ignition wire bracket, a waste spark harness, an ignition coil harness, and four spark plugs. Each coil mounts to coil bracket by three 1/4 20 x 2.5 in. screws. The coil bracket mounts to the cylinder head by two M12 x 1.75 x 30 metric bolts. See Figure "Remote Mount Ignition Coils" .
|
1. Nut |
5. Right Coil Label |
|
2. Lockwasher (1/4) |
6. Ignition Coil Pack (2) |
|
3. Ignition Coil Mounting Bracket |
7. Bolts (1/4 20 x 2.5 in.) |
|
4. Left Coil Label |
8. Bolt (M12 x 1.75 x 30 in.) |
Figure 1. Remote Mount Ignition Coils
Section 15.2.1
Removal of Ignition Coil Bracket
Remove the ignition coil bracket as follows:
- Unplug the ignition wire harness connectors from the ignition coil packs.
- Unplug the waste wire harness connectors from the ignition coil packs.
- Disconnect the ignition coil harness from the ignition coil packs.
- Remove the two M12 x 1.75 x 30 mounting bolts.
- Inspect the coil bracket. Refer to "15.2.1.1 Inspection of Coil Bracket" .
Section 15.2.1.1
Inspection of Coil Bracket
Inspect the coil assembly as follows:
- Visually check the coils for damage.
- If damage is found. replace coils as necessary. Refer to "15.2.2 Installation of Coil Brackets" .
- If no damage is found, reuse the coils. Refer to "15.2.2 Installation of Coil Brackets" .
- Visually check the coil towers and electrical connectors for dirt, debris, and oil.
- If contamination is found, clean as necessary and apply a light film of dielectric grease on the inside lip of each ignition wire and waste gate wire connector. Reuse component. Refer to "15.2.2 Installation of Coil Brackets" .
- If no contamination is found, reuse and apply a light film of dielectric grease on the inside lip of each ignition wire and waste gate wire connector. Reuse component. Refer to "15.2.2 Installation of Coil Brackets" .
- Visually check the coil bracket for damage.
- If damage is found, replace the bracket. Refer to "15.2.2 Installation of Coil Brackets" .
- If no damage is found, reuse the bracket. Refer to "15.2.2 Installation of Coil Brackets" .
Section 15.2.2
Installation of Coil Brackets
Install the coil bracket as follows:
- Install the bracket to the cylinder head with two M12 x 1.75 x 30 mounting bolts. Torque to 100-126 N·m (74-93 lb·ft). See Figure "Remote Mount Ignition Coils" .
- Press the ignition wire harness connectors on the coil towers corresponding to the cylinder positions indicated on the label. See Figure
"Ignition Coil Pack Label Location"
.

1. Left Label
3. Right Label
2. Ignition Coil Packs
4. Coil Towers
Figure 2. Ignition Coil Pack Label Location
Note: Ensure that each connector is fully seated on the coil tower.
- Press the waste wire harness connectors on the coil towers corresponding to the letter "G" (indicating a ground position). Position the longest lead of the harness on the left most ground tower, and the remaining leads in order of their length.
- Press the ignition coil harness into the connectors in the ignition coil packs.
Section 15.2.3
Removal of Ignition Coil Pack
Remove the ignition coil pack as follows:
- Remove the ignition coil bracket. Refer to "15.2.1 Removal of Ignition Coil Bracket" .
- Remove the three 1/4 20 x 2.5 in. bolts, nuts, and lockwashers per ignition coil packs.
Section 15.2.3.1
Cleaning of Coil Packs
Clean the coil packs as follows:
- Remove dirt, debris, and oil using clean fuel oil.

EYE INJURY
To avoid injury from flying debris when using compressed air, wear adequate eye protection (face shield or safety goggles) and do not exceed 276 kPa (40 psi) air pressure.
- Dry parts with compressed air.
- Inspect the coil packs. Refer to "15.2.3.2 Inspection of Coil Pack" .
Section 15.2.3.2
Inspection of Coil Pack
Inspect the coil packs as follows:
- Visually check the coil packs for damage.
- If damage is found, replace as necessary. Refer to "15.2.4 Installation of Coil Packs" .
- If no damage is found, reuse the coil packs. Refer to "15.2.4 Installation of Coil Packs" .
Section 15.2.4
Installation of Coil Packs
Install coil packs as follows:
- Apply a light film of dielectric grease on the mounting face of the coil pack.
- Install the ignition coil pack on the coil bracket with three 1/4 20 x 2.5 in. bolts, nuts, and lockwashers per coil pack. Torque bolts to 9-12 N·m (7-9 lb·ft).
- Install the coil bracket to the cylinder head. Refer to "15.2.2 Installation of Coil Brackets"
.
Note: If a new ignition coil pack is being installed. Attach either a left or right label on the new coil pack corresponding to the position of the coil pack on the engine. See Figure "Ignition Coil Pack Label Location" .
1. Left Label
3. Right Label
2. Ignition Coil Packs
4. Coil Towers
Figure 3. Ignition Coil Pack Label Location
| Series 50 Service Manual - 6SE50 |
| Generated on 10-13-2008 |