Section 74.4
Troubleshooting Flash Code 82, PID 98/FMI 4
The OLS/EOL Sensor is part of the Maintenance Alert System (MAS).
Section 74.4.1
Read Codes
Perform the following steps to read codes:
- Turn ignition ON, plug in the diagnostic tool and read the active codes.
- Record or print codes and turn the ignition OFF.
- If code 98/4 displays with 232/1, troubleshoot 232/1 first.
- If code 98/4 displays, refer to "74.4.2 Check for Open and a Short" .
Section 74.4.2
Check for Open and a Short
Perform the following steps to check for open:
- Unplug the Oil Level Sensor/Engine Oil Level Sensor.
- Insert the jumper wire between cavities B and C. See Figure
"Oil Level Sensor"
.
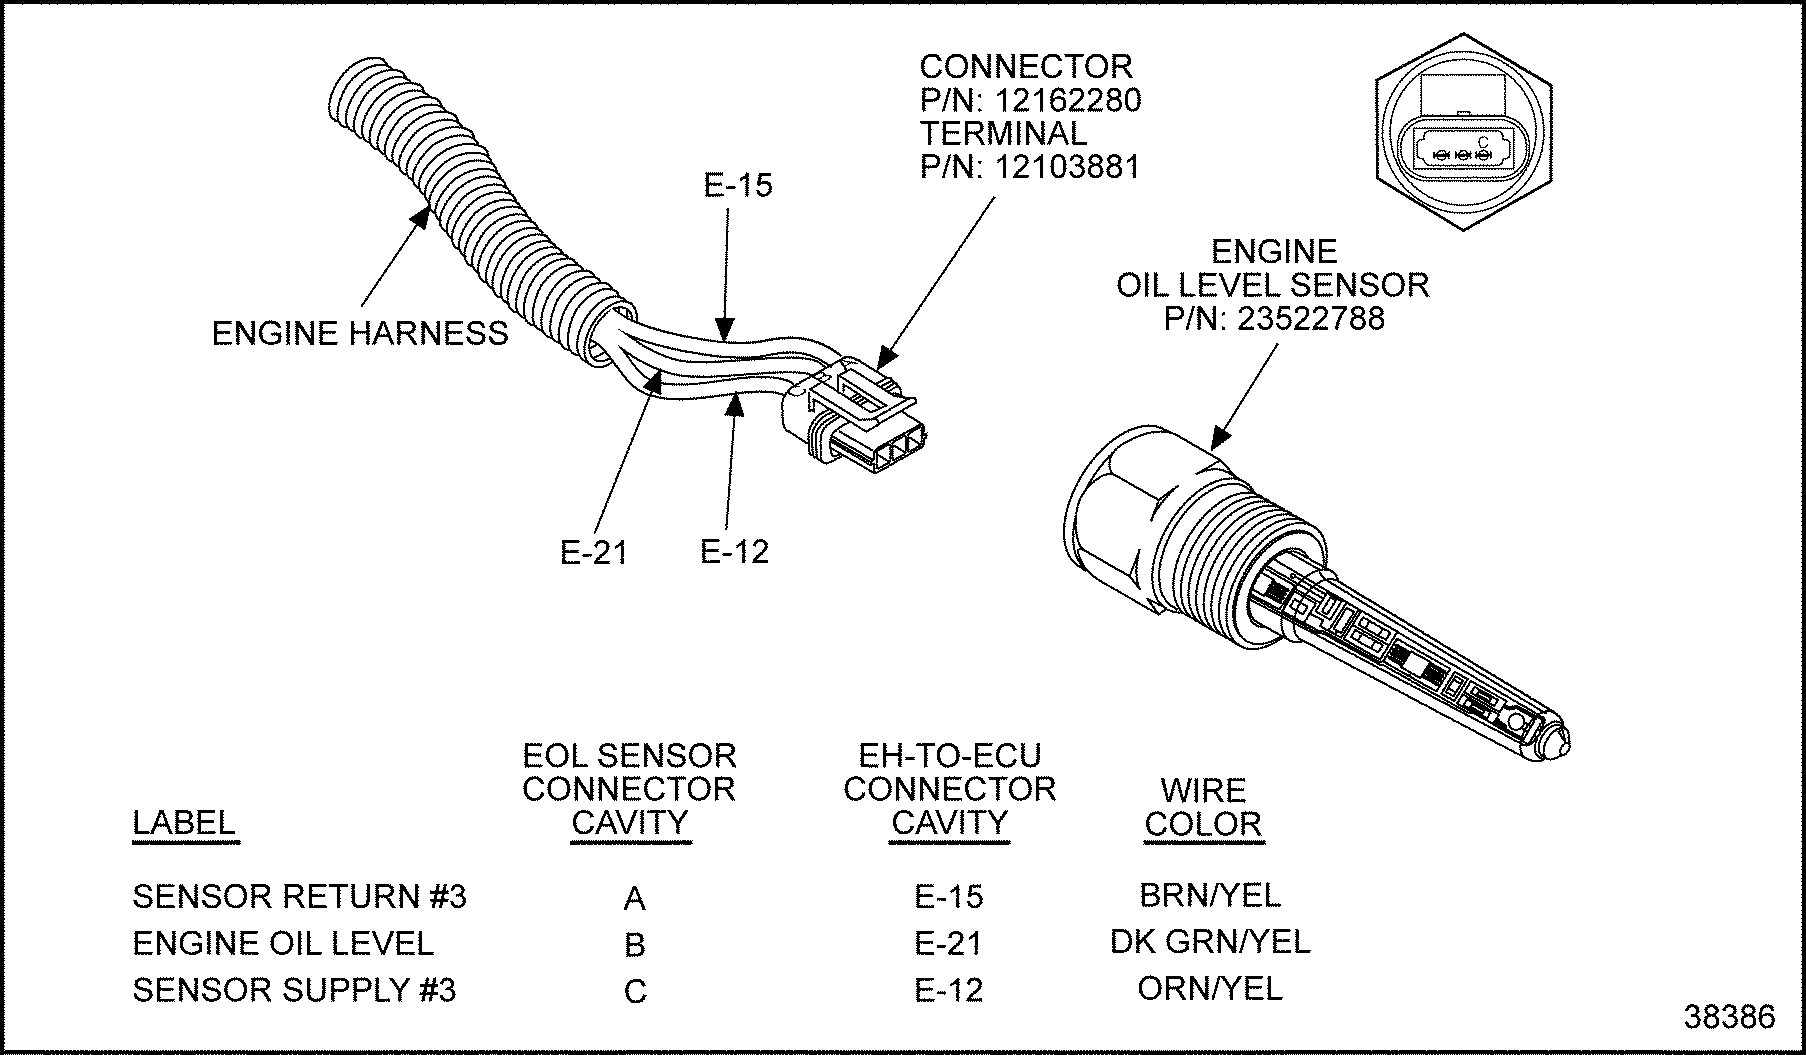
Figure 1. Oil Level Sensor
- Turn ignition ON.
- Read codes.
- If code 98/3 displays, check the connectors for damaged, open or broken pins. If everything checks out, go to step 5 . If damage is noted, repair and verify the repairs. Refer to "74.4.4 Verify Repairs" .
- If code 98/4 displays, refer to "74.4.3 Check Engine Harness Connector for Open" .
- Measure resistance between cavity A and C , and again between cavity A and B of the sensor connector. See Figure
"Oil Level Sensor"
.
- If either reading is less than 10 Ω, that wire is shorted to the sensor return E-15. Repair the short or replace the harness. Verify the repair. Refer to "74.4.4 Verify Repairs" .
- If both readings are greater than 10 Ω, replace the sensor. Verify the repair. Refer to "74.4.4 Verify Repairs" .
Section 74.4.3
Check Engine Harness Connector for Open
Perform the following steps to check for open:
- Unplug the Engine Harness connector at the ECM/ECU.
- Measure resistance with the jumper still plugged in, between cavity E-21 and E-12. See Figure
"Oil Level Sensor"
.
- If the reading is greater than 10 Ω, either the E-12 or E-21 wire is open. Repair the open or replace the harness. Verify the repair. Refer to "74.4.4 Verify Repairs" .
- If the reading is greater than 10 Ω, replace the sensor. Verify the repair. Refer to "74.4.4 Verify Repairs" .
Section 74.4.4
Verify Repairs
Follow these steps to verify the repair:
- Plug in all connectors.
- Start and run the engine for five minutes.
- Plug in diagnostic tool and read active codes.
- If no codes display, troubleshooting is complete. Return the engine to service.
- If code 98/4 displays, review the MAS troubleshooting to find the error or contact the DDC Customer Support Center (313–592–5800) for assistance. Refer to "74.4.1 Read Codes" .
| Series 60 DDEC V Troubleshooting Guide - 6SE570 |
| Generated on 10-13-2008 |